/image%2F0703241%2F20140120%2Fob_b8b3b5_blog-header-new2.jpg "nail art - reviews - swatches - nail tutorials")
Hello lovelies,
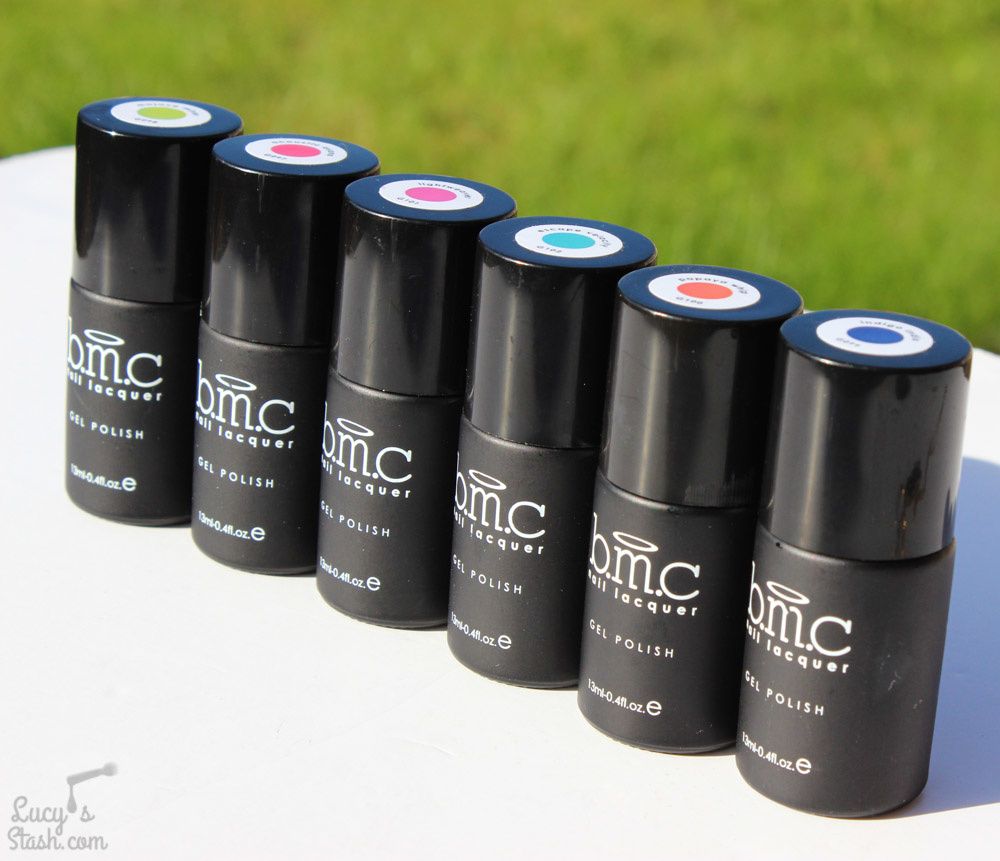
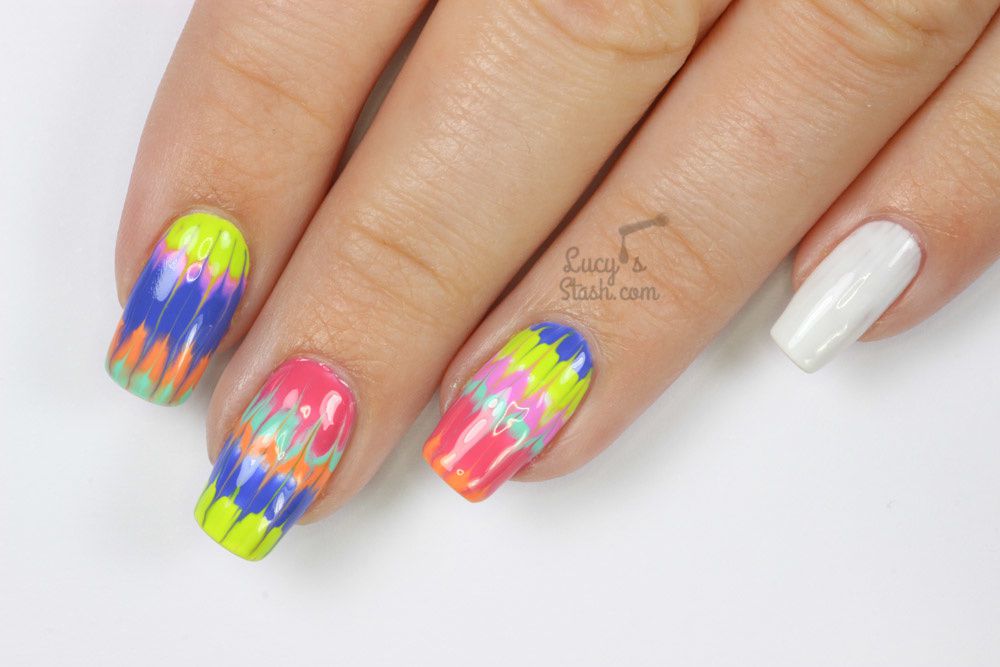
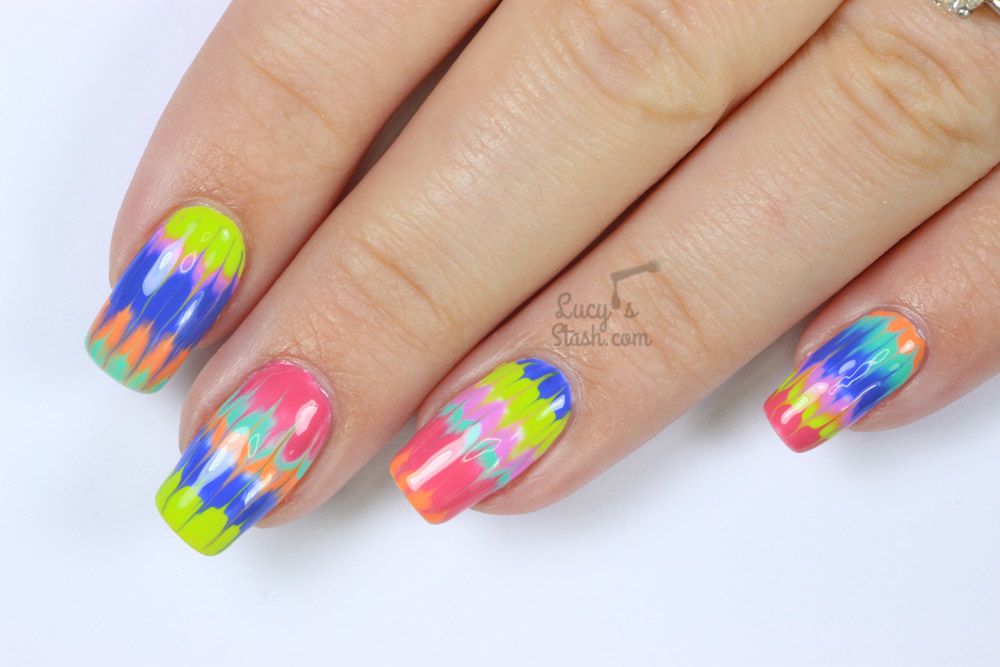
Remember the cool Bundle Monster Festival Box I've showed you few weeks back? Well, I promised you a review of the Cali Dreamin' gel polish collection so here it is! But first, here's the description of the collection that brings summer to your heart just by reading it!
"High desert backdrops, Springtime music festivals, and the lifestyles of these concert goers were the inspiration for our Cali Dreamin' Collection of cream colored gel nail lacquers. These 6 colors will personify your inner music loving-road warrior that's rollin' with the top down on your '69 VW bug and just feeling new and fresh: Acoustic Asana (G097) is a salmon pink fitting of beautiful Cali sunsets, Mojave Mixer (G098) is a lime green inspired by lush green grass of the Mojave Performance Stage, Indigo Indio (G099) is a gorgeous dusty, navy lavender blue inspired by some of the art of the desert in Indio, California, Papaya Whip (G100) is a soft orange befitting of the pueblo colored high desert mountains. Lightweaver (G101) is a stunning lilac purple at will warm your inner flower child, and Escape Velocity (G102) was inspired by the brilliant turquoise blue skies of a warm Spring day cruising down the I-10 leaving LA to fresh, desert air."

This was my first experience with Bundle Monster gel polish and I didn't have many expectations. I thought it will probably be poorly pigmented and maybe with some curing issues. But luckily, I was pleasantly surprised so I'm happy to share it with you.
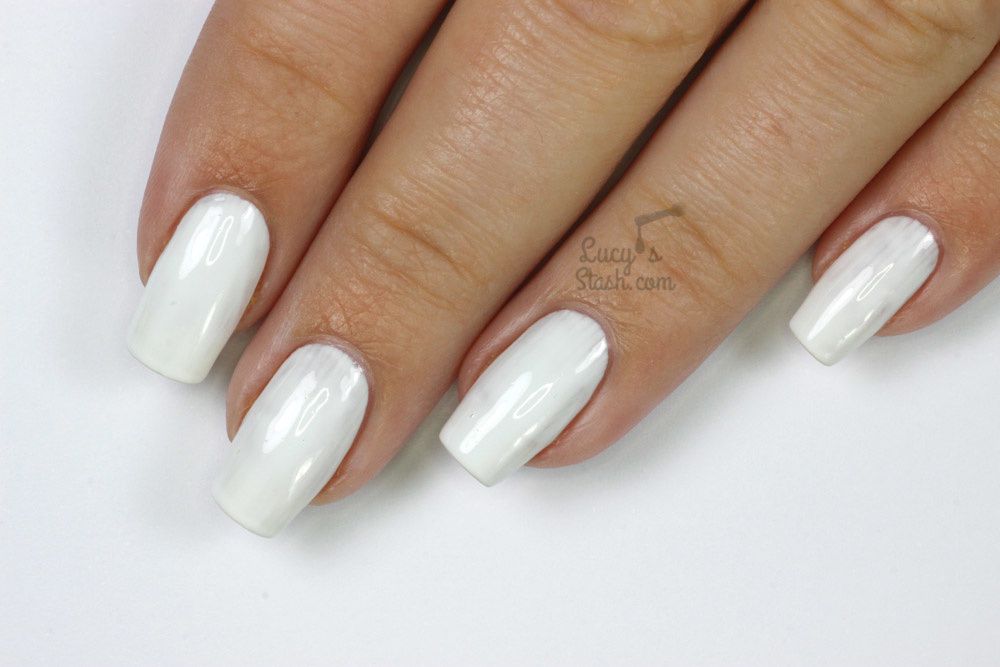
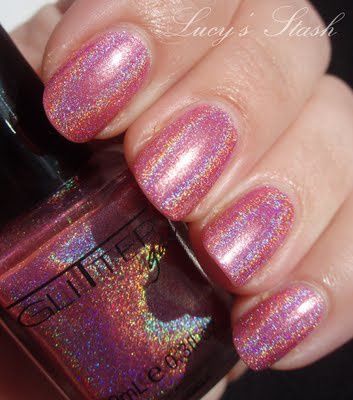
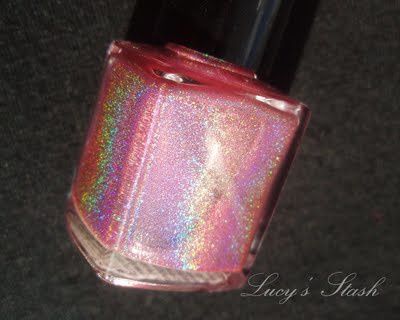
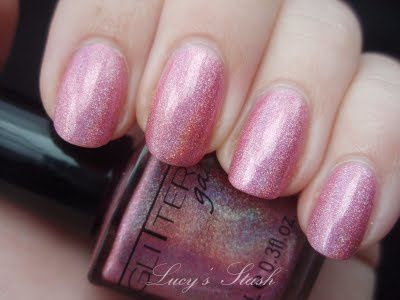
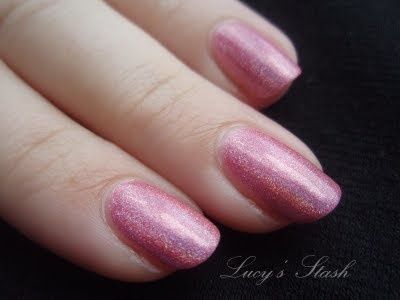
The gel polishes come in black bottle and cap with white writing and a colour label at the top of the cap. Each bottle holds 13ml. I've also swatched these on swatch sticks to see the formula and opacity and I was happy with both. The polishes are creamy and smooth, they applied lovely and were opaque in two coats. They look a bit brighter over white base.
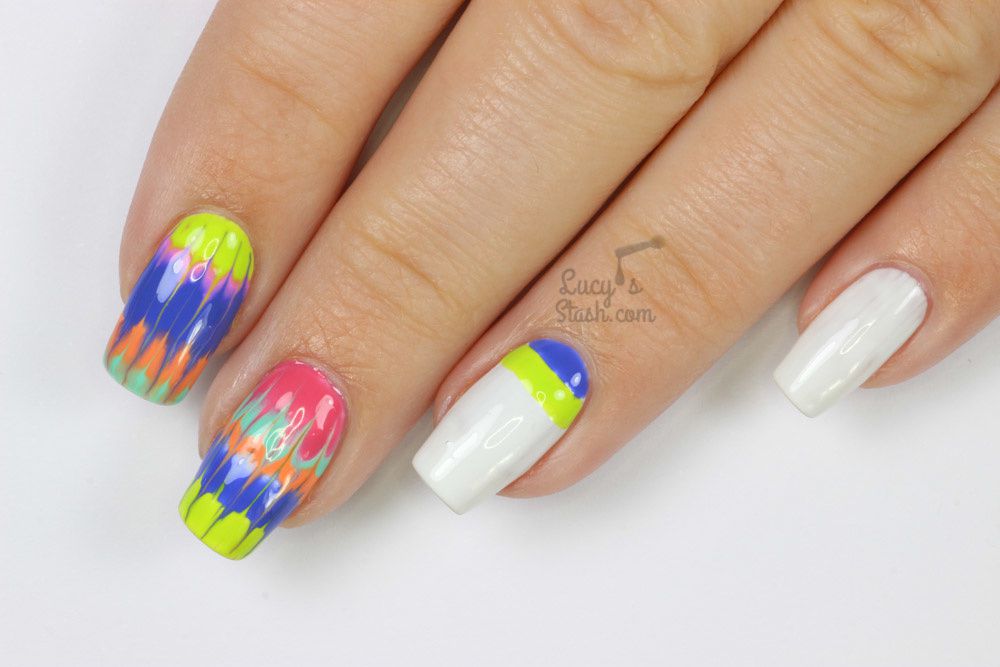
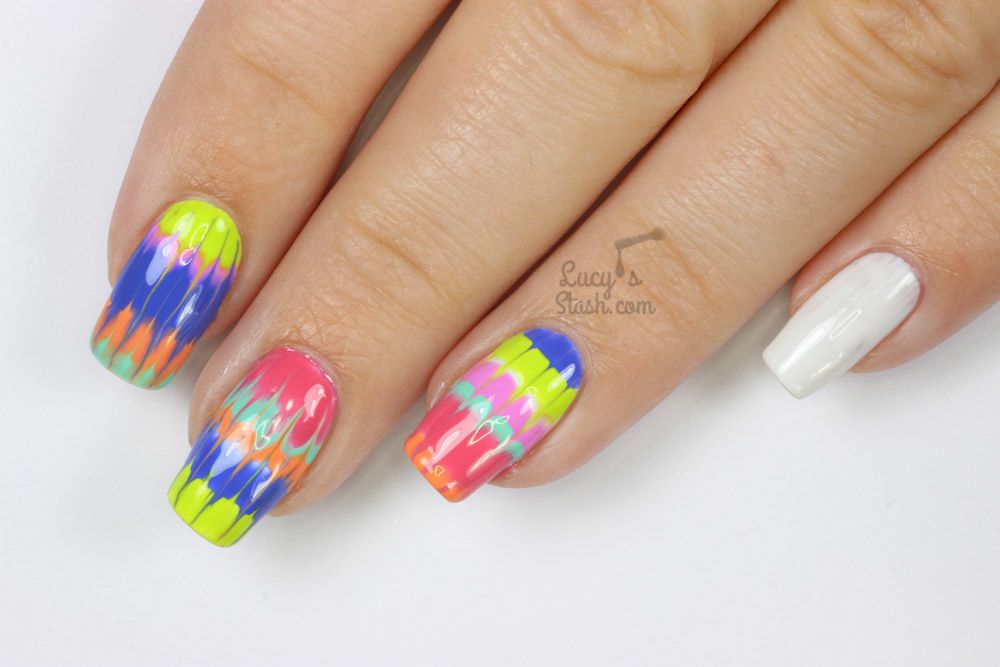
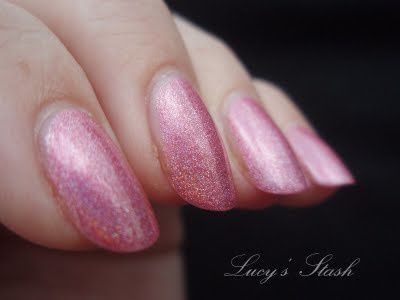
I've decided to do a marble drag design with all of the colours because they look amazing together! I've used the following BM gel polishes: Mojave Mixer, Acoustic Asana, Lightweaver, Indigo Indio, Escape Velocity, Papaya Whip.

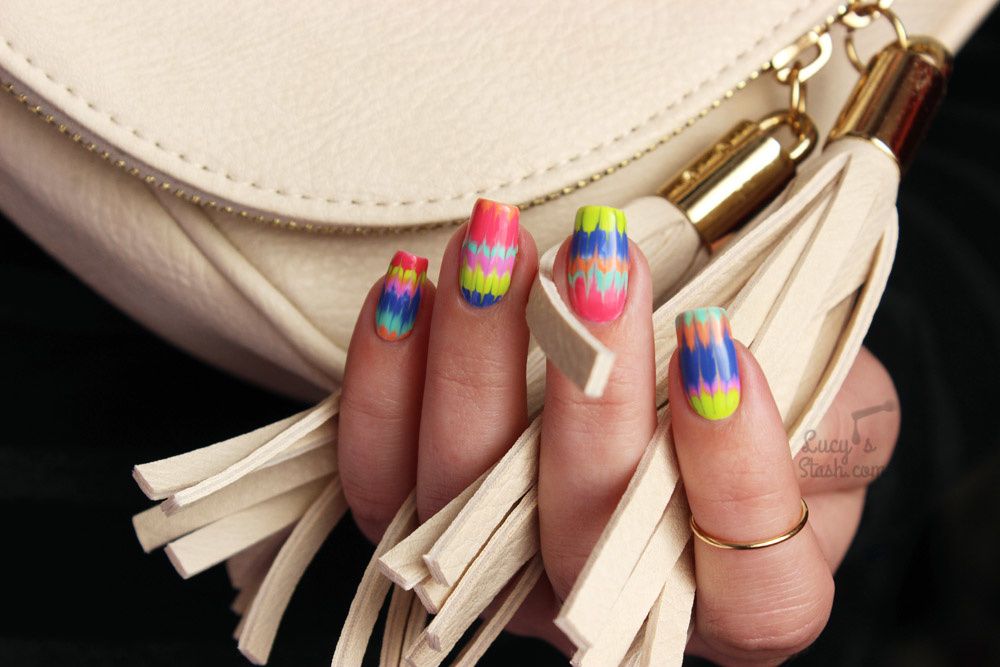
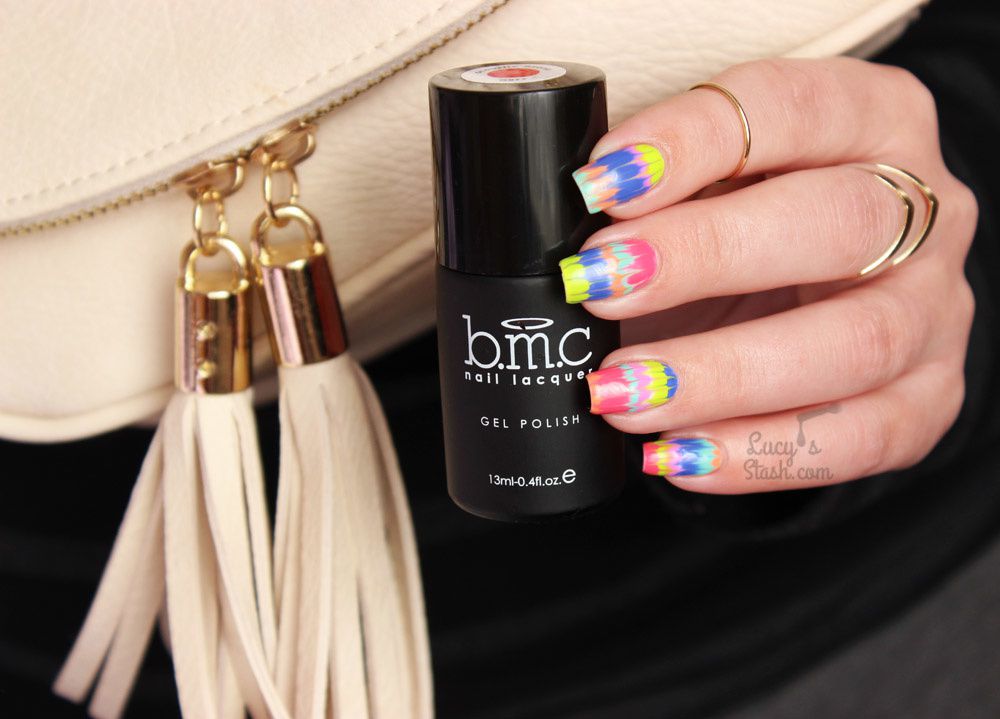


The marble came out perfect and I love how some of the shades seep into each other in some areas. It is such a fun and summery design!
I've prepared a step by step tutorial for you, you can recreate this design with any other gel polish brand.
How to get this look
Step 1 - apply a coat of base coat, cure.
Step 2 - apply a coat or two of white gel polish, cure. This is so that we can apply just one layer of colours and they will be fully opaque and bright. Cure.
Step 3 - Use a small nail art brush or striping brush and apply a stripe of each gel colour on the nail. Paint the strips next to each other with different widths and cover the white underneath completely, do not cure yet.
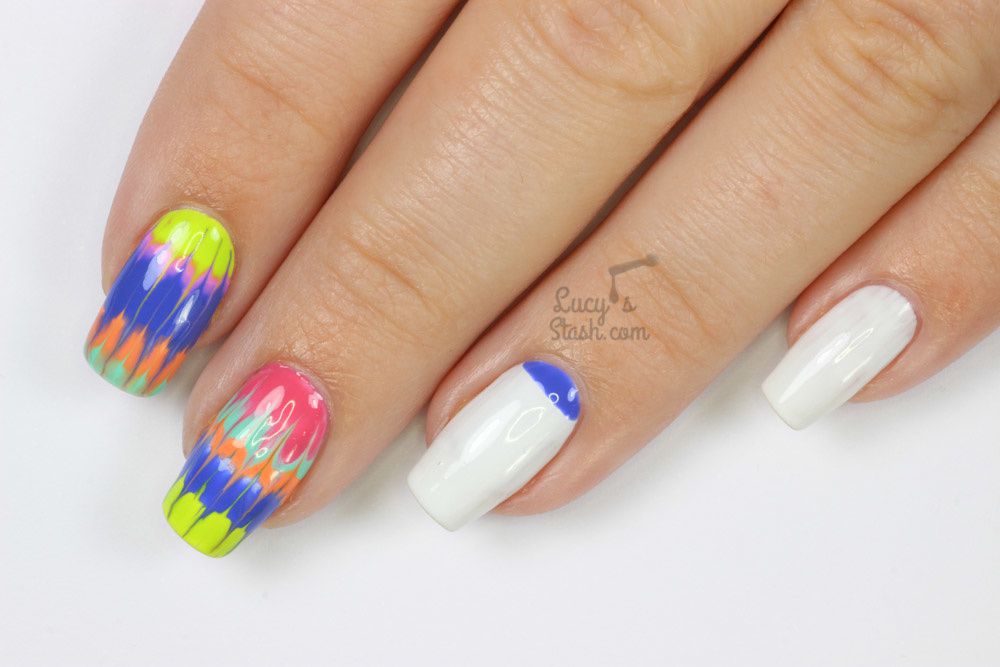


Step 4 - use a pin/very thin brush to drag through the colours. Drag in one direction (from cuticle to the tip) and leave a bit of space in between the lines, do not cure yet.
Step 5 - drag through the colours again in the opposite direction. Drag in one direction again (from tip to the cuticle) in between the existing lines, cure.
Step 6 - Apply gel polish top coat, cure. Remove the inhibition (sticky) layer.

Have a lovely day! Lucie x
*PR samples
/image%2F0703241%2F20201222%2Fob_7b3a98_semilac-my-love-gel-polish-nails-4.jpg) My Snowflake Nails for Christmas 2020 with Semilac...
My Snowflake Nails for Christmas 2020 with Semilac.../image%2F0703241%2F20200814%2Fob_22ce10_lart-supreme-kit-29-2.jpg) REVIEW: LART Supreme Mineral Powder Dipping System...
REVIEW: LART Supreme Mineral Powder Dipping System.../image%2F0703241%2F20170429%2Fob_799087_gilded-marbled-amethyst-nails-6.jpg) Dress your nails to impress with this marbled amethyst...
Dress your nails to impress with this marbled amethyst.../image%2F0703241%2F20170727%2Fob_3240b9_pink-gold-dry-brush-nail-art-4.jpg) The Manicure That (I) Rocked The Scratch Stars Awards...
The Manicure That (I) Rocked The Scratch Stars Awards...

/image%2F0703241%2F20161115%2Fob_4cb34a_models-own-glitterball-collection-11.jpg) Models Own Glitterball Collection & Instagram GIVEAWAY...
Models Own Glitterball Collection & Instagram GIVEAWAY.../image%2F0703241%2F20161105%2Fob_e35aa2_a-england-tennyson-s-romance-collectio.jpg) A England TENNYSON'S ROMANCE collection - Review &...
A England TENNYSON'S ROMANCE collection - Review &.../image%2F0703241%2F20160909%2Fob_24279b_ilnp-diablo-2.jpg) Get your nails ready for Autumn with ILNP Diablo |...
Get your nails ready for Autumn with ILNP Diablo |.../image%2F0703241%2F20160909%2Fob_36a136_a-england-kalinka-3.jpg) A England Kalinka - Review & Swatches | Russian Soul...
A England Kalinka - Review & Swatches | Russian Soul...