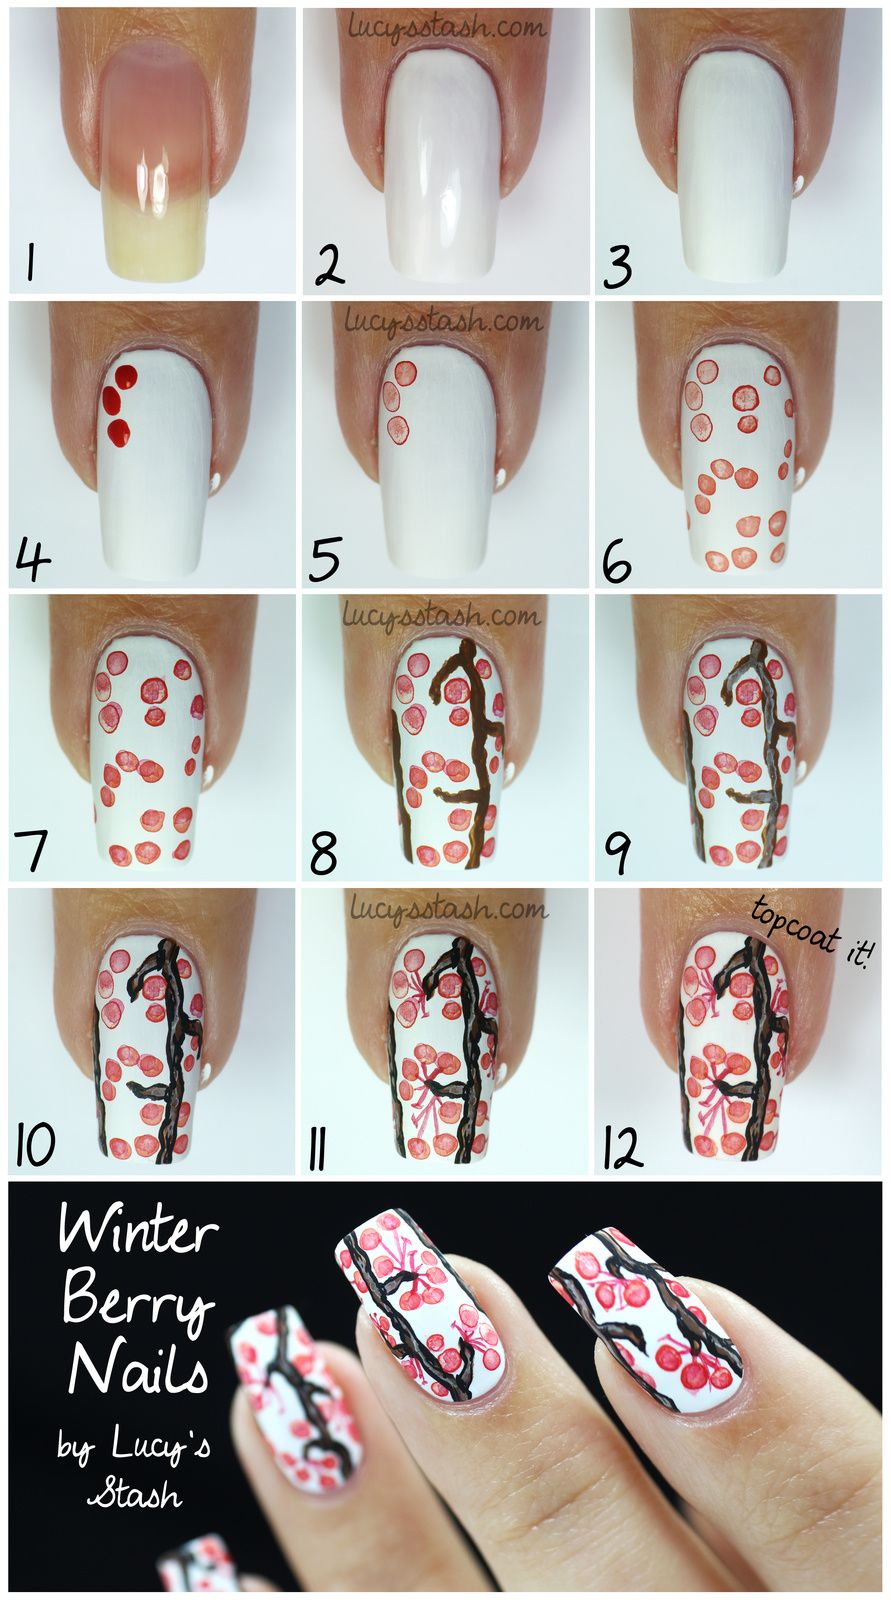
Showing posts with label acrylic paint

Hello lovelies!


Excuse my absence, I haven't been very productive and energetic in the past few weeks. Hopefully that will change soon.


As every year, I spend a little bit of time painting Easter eggs. This year I have been inspired by the very talented Elspeth McLean, an Australian artist who takes dotillism to another level.


So today I want to show you three dotted Easter eggs I did and there's a tutorial (well more of a video recording the process) for each of them!


Easter Crafting: How To Create Dotted Easter Eggs


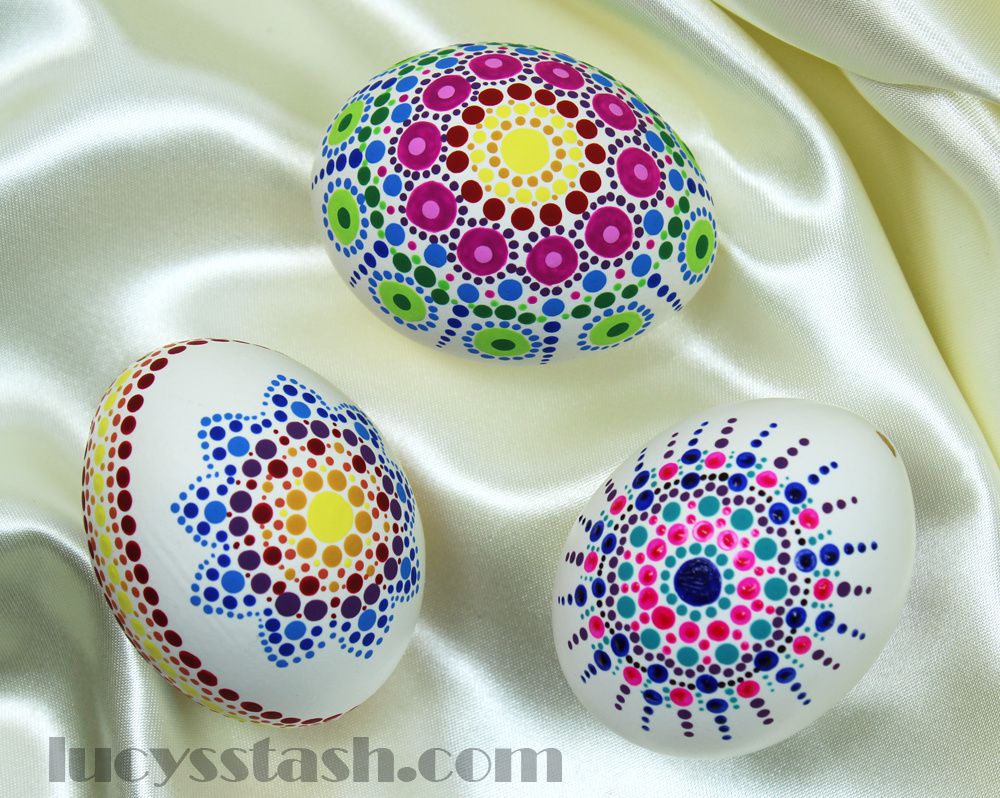
All eggs were decorated using acrylic paints, dotting tools and a small brush. I considered using nail polish but it would make the job much harder since it dries so fast. A drop of acrylic paint stayed wet for the whole time I was decorating.


Easter Crafting: How To Create Dotted Easter Eggs


This first egg is inspired by the colourful painted stones Elspeth does and it's also my favourite of all three!


And now the promised tutorial:


Easter Crafting: How To Create Dotted Easter Eggs


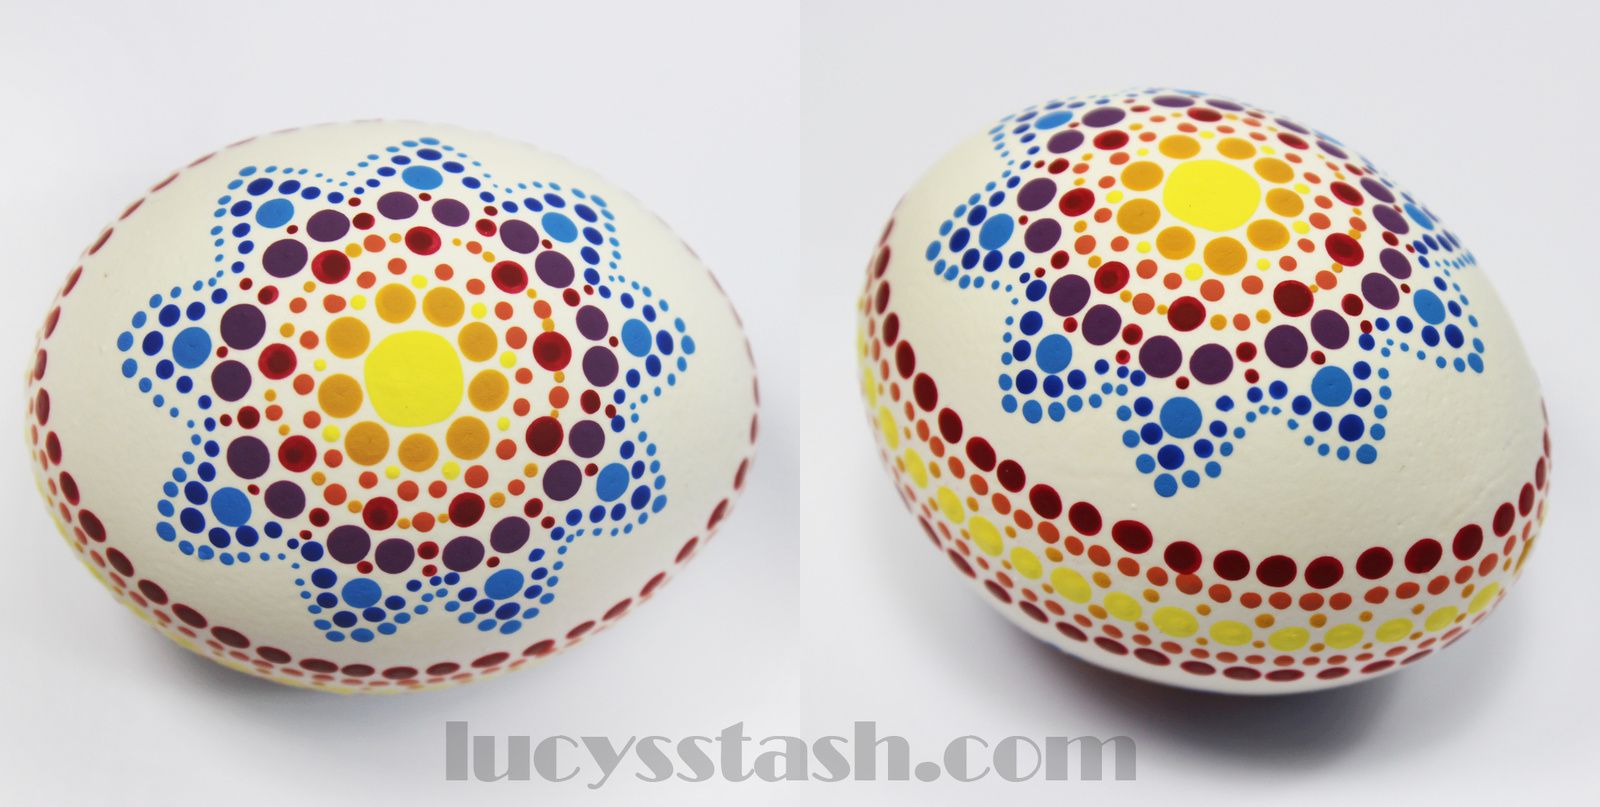
For this pattern I've used colours that are usually used in Czech folklore art including painted Easter eggs...


How I did it:


Easter Crafting: How To Create Dotted Easter Eggs


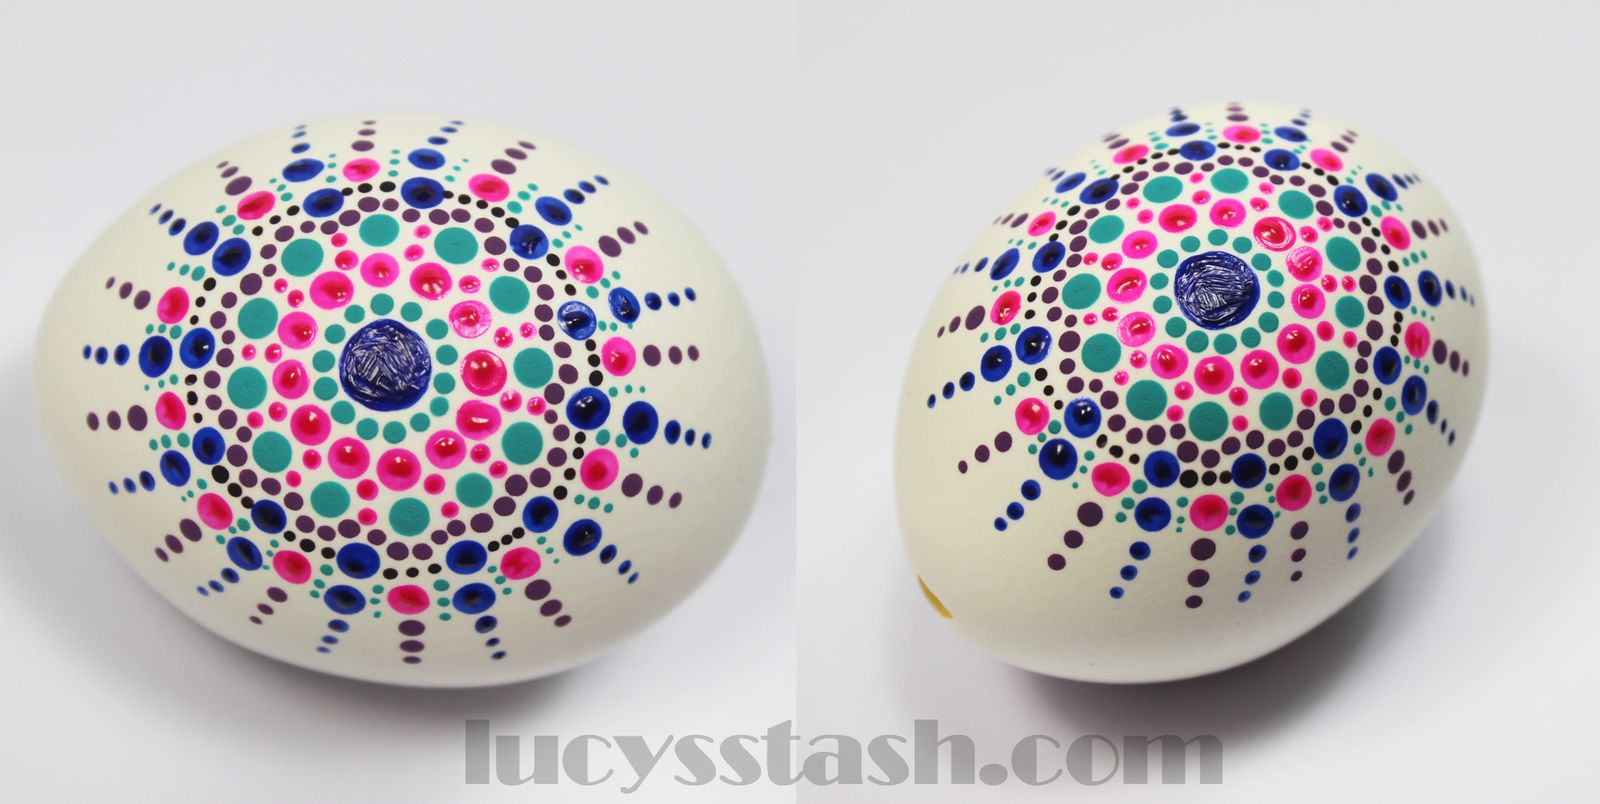
And this last one was an experiment with acrylic paints that I've never used but I probably won't use again because they are not very opaque and dry glossy and uneven. I still like the egg though ;)


Here's how I did it:


I hope you've enjoyed this post and maybe it will inspire you to decorate your own Easter eggs! Sorry it's not nails but there are more things I like in this world apart from nails :) If you would like to see my previous Easter adventures, you can see it here and here.


Have a nice Easter break and let me know what you think of my Easter eggs! Lucie x


Hello lovelies,


Earlier, I have shared with some of you that I have been lately in a creative slump. I haven't felt inspired, I didn't feel like doing any nail art not even anything overly festive. Few days ago it changed - I got contacted by minted.com inviting me to check out their site. I've noticed they have an art marketplace section with different art prints. I came across so many inspiring artworks and I finally felt that familiar urge to paint! Today's nails are inspired by a Dazzle Berry Art print. I didn't copy it exactly, but I took the idea and modified it for nails. I also wanted to use more natural colours even though I absolutely love the colours the artist used.


Winter Berry Nails | Inspired By Artwork


I've taken pictures to create a tutorial for you as well. Here's how to do it:


  1. Apply base coat
  2. Apply two coats of white nail polish. I have used OPI Alpine Snow
  3. Paint the nails with a thin coat of white acrylic paint
  4. Thin down red acrylic paint with water and put droplets on the nail using brush. Pat the brush on a paper towel to get rid of the excess water in the brush
  5. Use the brush to soak in the droplets on the nails. It should leave coloured outline or dots depending on how long you wait. you don't have to wait longer than few seconds
  6. Continue adding these 'watercolour style' dots
  7. Thin down darker shade of red acrylic paint with water and put droplets on the nail where the lighter drops are. Try to overlap them or do imperfect dots so they add dimension and shading
  8. Using brown acrylic paint and brush, roughly paint branches
  9. Thin down white acrylic paint with water and add highlight to the branches. Do it the same way as the dots - paint it on watery and then soak in the excess water
  10. Using black acrylic paint and thin detailing brush, outline the branches and add few more black lines to add dimension
  11. Use the watered down dark red acrylic paint and thin detailing brush and connect the berries to the branches. Paint few empty stems without berries
  12. Topcoat the nails. I have used OPI Matte Topcoat but if you want the artwork to last the longest possible time then use regular topcoat first and then matte topcoat


This is the original artwork that inspired these nails:


DAZZLE BERRY limited edition print by Me Amelia; picture used with permission from minted.com

DAZZLE BERRY limited edition print by Me Amelia; picture used with permission from minted.com


I can't wait to recreate more artworks from that site, there are so many beautiful pieces! I've spent hours at their site just browsing and THEN I've noticed they do wedding stationery too! Oh my goodness I've seen so many beautiful designs and have spent couple more hours browsing them. What a wonderful site! If you would like to get inspired too and browse their Art Marketplace and latest art, the address is www.minted.com/art ;) Apart from art prints and wedding stationery you can find there Christmas cards, photo cards, map presents (which are super cool!), party decor and more.


It feels so good to do such cool art and post again! I truly hope you've enjoyed it and if so then let me know your thoughts in the comments.


Have a lovely Sunday! Lucie x