Showing posts with label charcoal

Hello lovelies,


Today's post is about possibilities and the pearlescent cellophane that's rocking the nail world right now. The shattered glass look is very hot right now but have you thought about what else can be done with it? I've already tried half-moon manicure which worked well (coming soon).


Today I'll show you a different look where I've cut the cellophane into squares (or as close as I could get to a square shape) and then arranged it on the nails.


All About Squares! Nail Art with Models Own GlitterGel Starburst


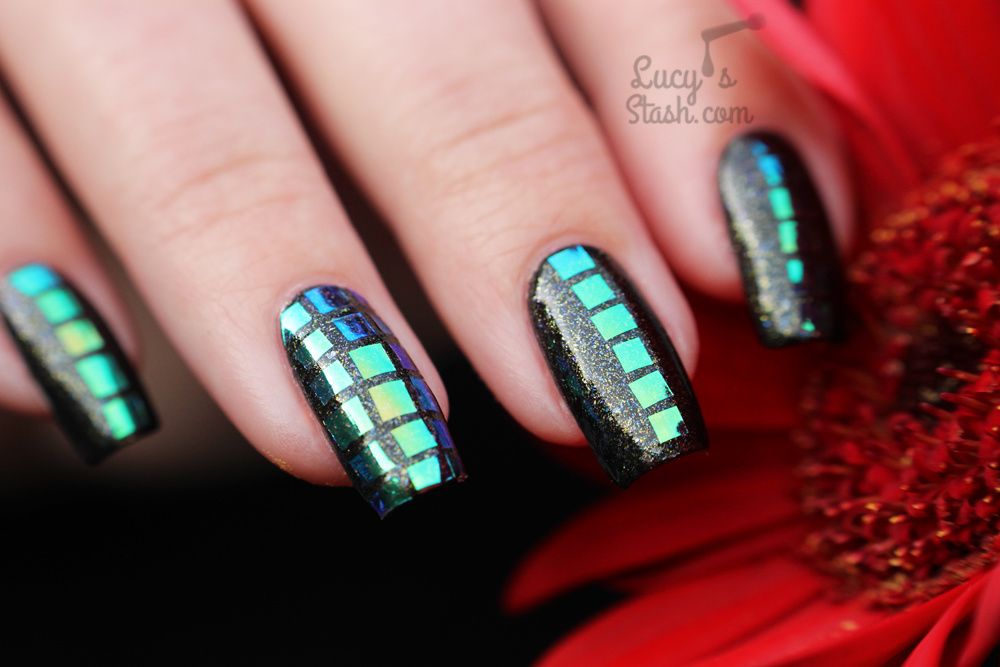
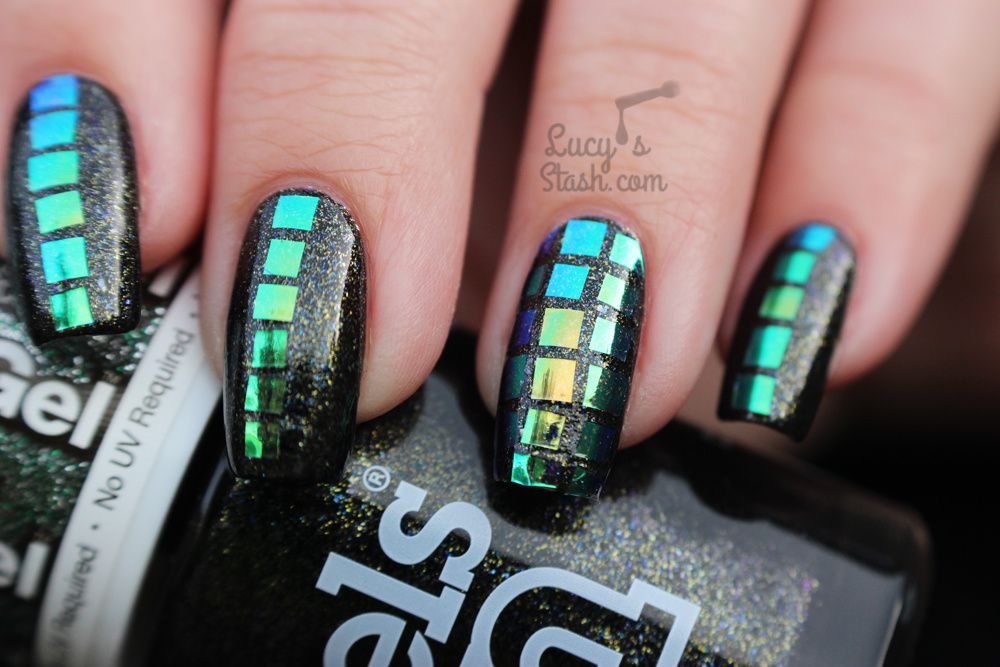
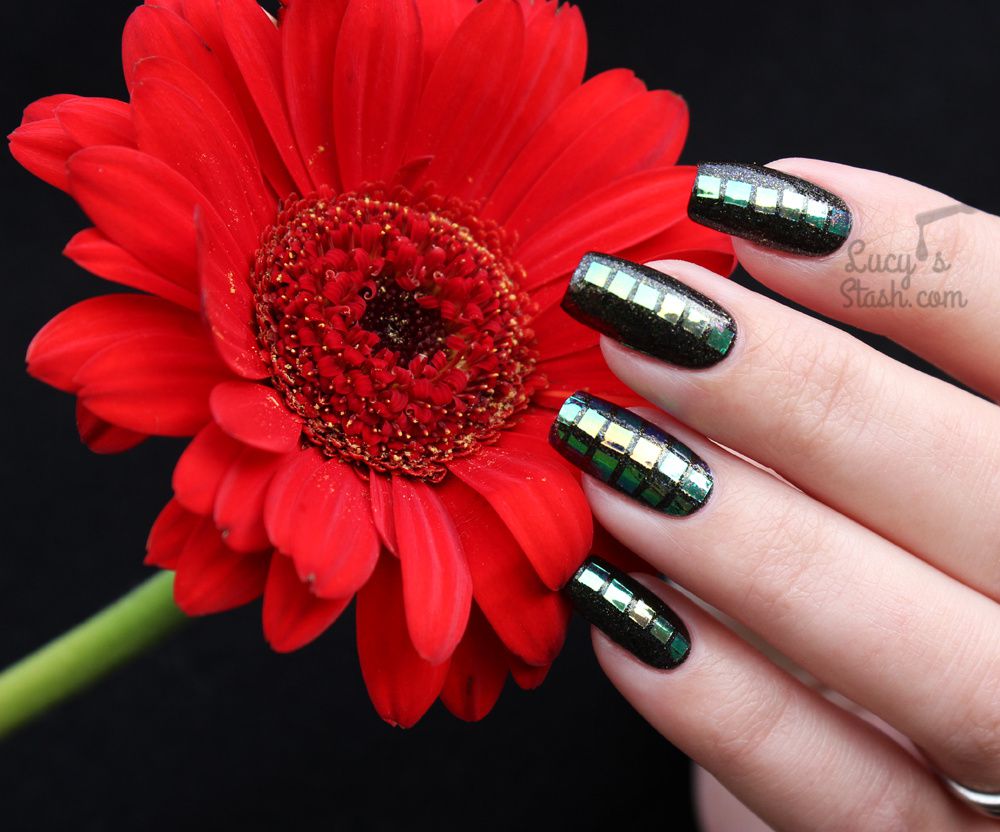
My head is buzzing with ideas about all the possibilities, shapes and sizes that can be done with the cellophane, this is just one of them! I have applied the cellophane squares over two coats of Models Own GlitterGel Starburst and then sealed them with two coats of topcoat.


You can buy different shades of the cellophane in Born Pretty Store which ships worldwide. You can also use my code LUHH10 for $10 off your order.

All About Squares! Nail Art with Models Own GlitterGel Starburst


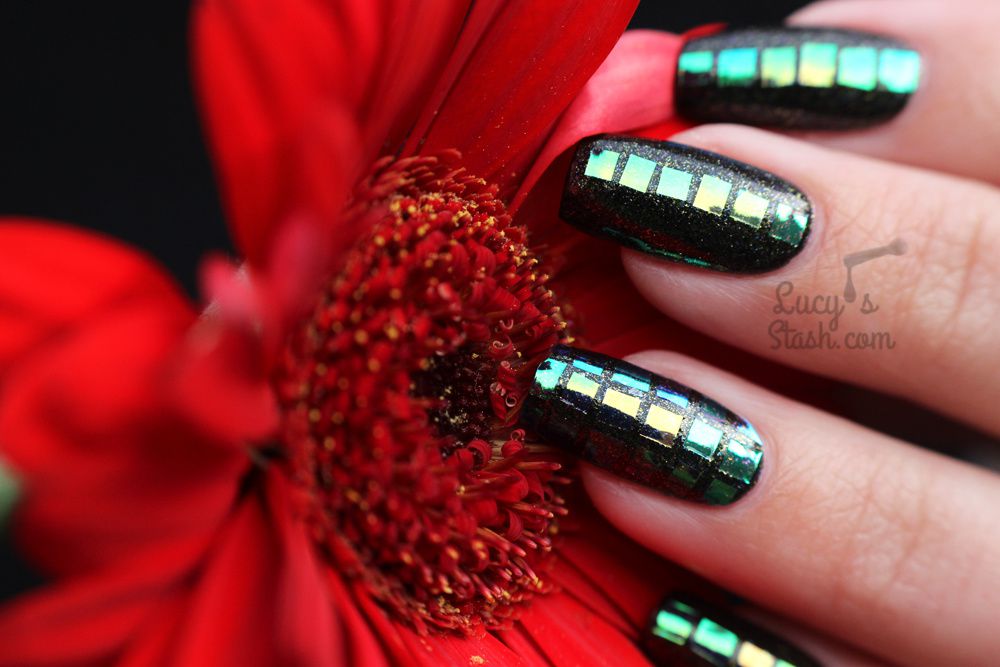
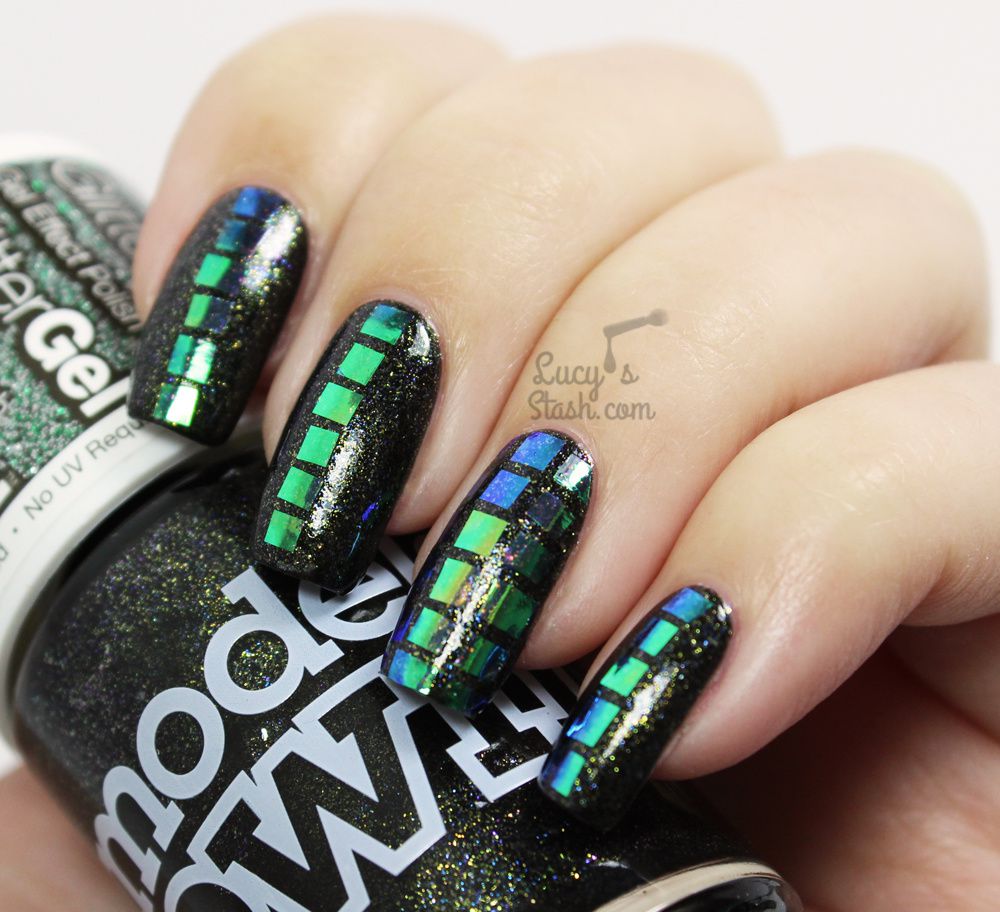
Starburst* is a charcoal black base with gold-green and blue sparkle. The formula was nice and not at all chunky like I would expect. It flowed nicely and application was so easy! I applied two coats which were fully opaque and quite glossy. I applied a coat of topcoat to get a lovely smooth finish.


All About Squares! Nail Art with Models Own GlitterGel Starburst


The Models Own GlitterGel Starburst is a new colour and formula from the GlitterGel collection so I'll tell you a bit more about it. It contains five brand new sparkling glitter shades. All polishes have thicker and shiny HyperGel formula and the wide brush for easier application. They are described as party season collection so whether you'll wear them at Christmas party or New Year's, you'll be in!


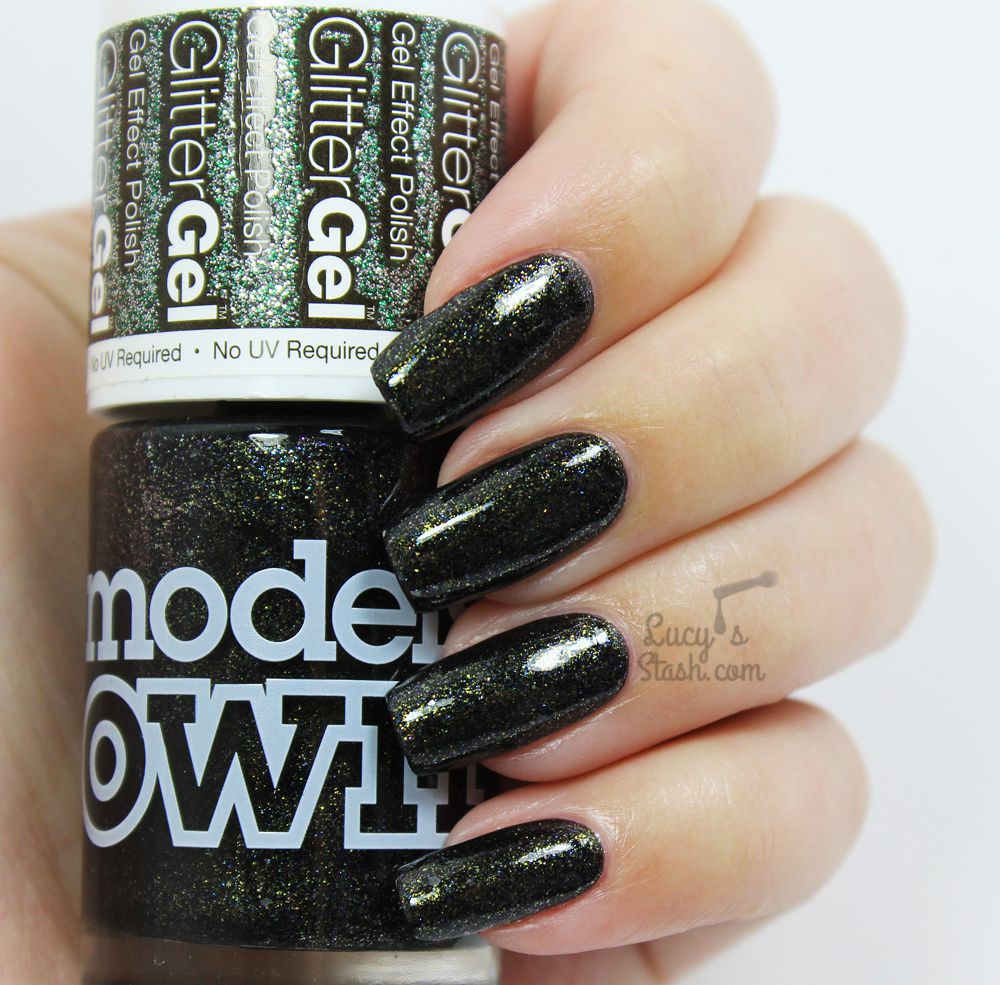
The GlitterGel collection is out right now and available at www.modelsownit.com, in Bottleshops and in Superdrug.


Have a lovely day! Lucie x

*PR sample

Hello lovelies,


It's time for a nail art challenge! I'm part of a Facebook group called PAINT ALL THE NAILS and this month's challenge is double stamping. I admit to cheating a bit because I've filled flowers with gold polish as stamped decals, not just pure stamping. But I'm pretty happy with the result so let's have a look at the manicure ;)


Double Stamp All The Nails!


How to achieve this look:


  1. Apply a coat of base coat on clean dry nails
  2. Paint the nails with two coats of grey polish, I've used 'Ard As Nails Slated
  3. Then using B. Loves Polish Colour Alike stamping polish in B. a Twilight and chevron pattern from B.01 ♥ geometry is perfect ♥ stamping plate, stamp on the charcoal chevrons
  4. Next create the stamping decals, gold roses framed with white. Stamp roses from B.02 ♥ flower power ♥ plate with white Essence stamping polish onto B. Loves plates XL stamper and leave it to dry a minute.
  5. Then fill in the roses with gold B. Loves Polish Colour Alike stamping polish in B. a Golden Queen
  6. Once it dries paint a layer of topcoat over the decal and let it dry again. I've used Seche Vite top coat
  7. Once the decal is dry, peel it off the stamper and lightly press it on the nail freshly painted with topcoat
  8. Apply another layer of topcoat over the whole nails and decals
  9. Cut off the excess pieces of the decal with scissors and then clean up the rest with brush and acetone


I've also played with matte topcoat (Cuccio Matte Topcoat) and the matte version looks great, so I want to share it with you as well:


Double Stamp All The Nails!


As always, if you recreate this look then please let me know by tagging @lucysstash or you can include #lucysstash so I can see your creation. I love seeing your nailart!


Hope you've enjoyed today's post and manicure and please check out manicures from other bloggers: