Showing posts with label how to

Hello lovelies,

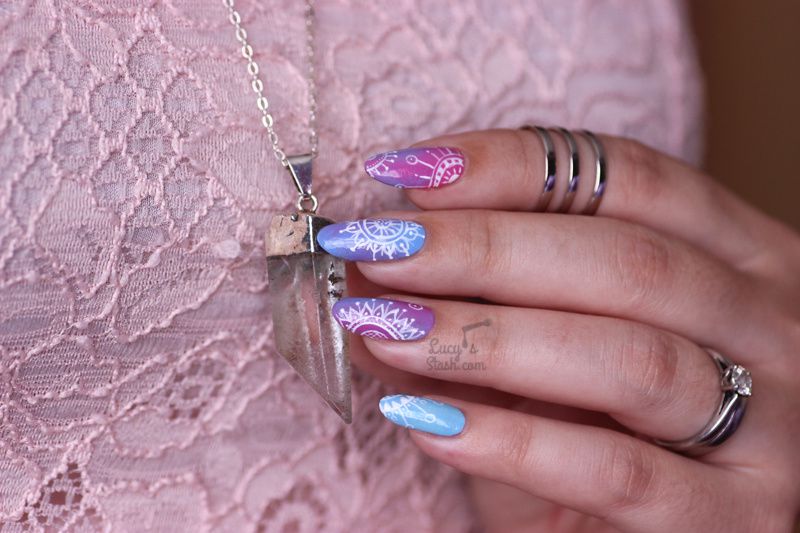
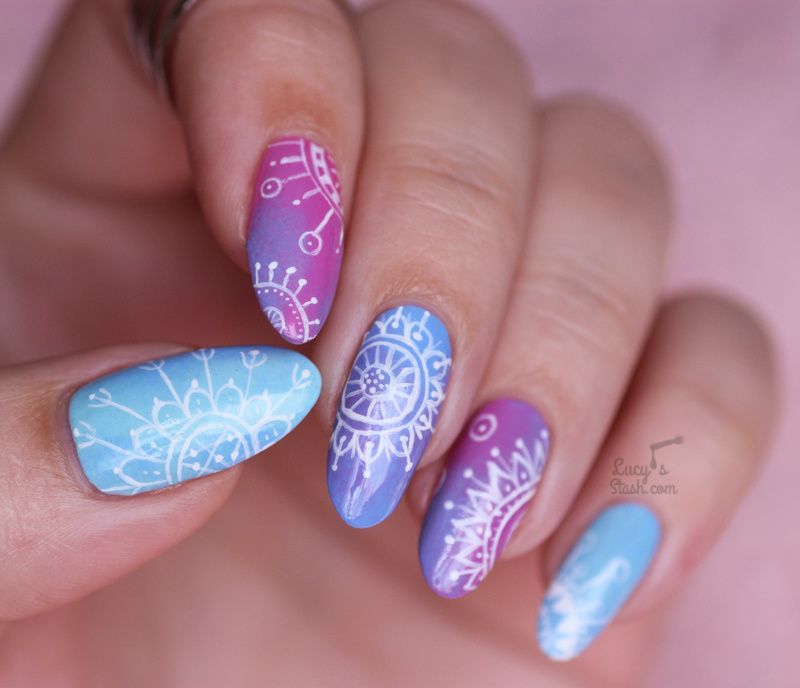
I finally finished editing my new nail art tutorial and I think you'll like it ;) I'm calling it Dreamy Mandala Nails because I've used soft and almost pastel-y colours and painted over them with mandala-like patterns.

On another note - it was my birthday yesterday! I've already had a pre-celebration with two of my girlfriends on Saturday where we went to a concert in London and had a great time! I also went lovely dinner with my husband so all in all, it was a lovely birthday. Next year, the BIG 30!

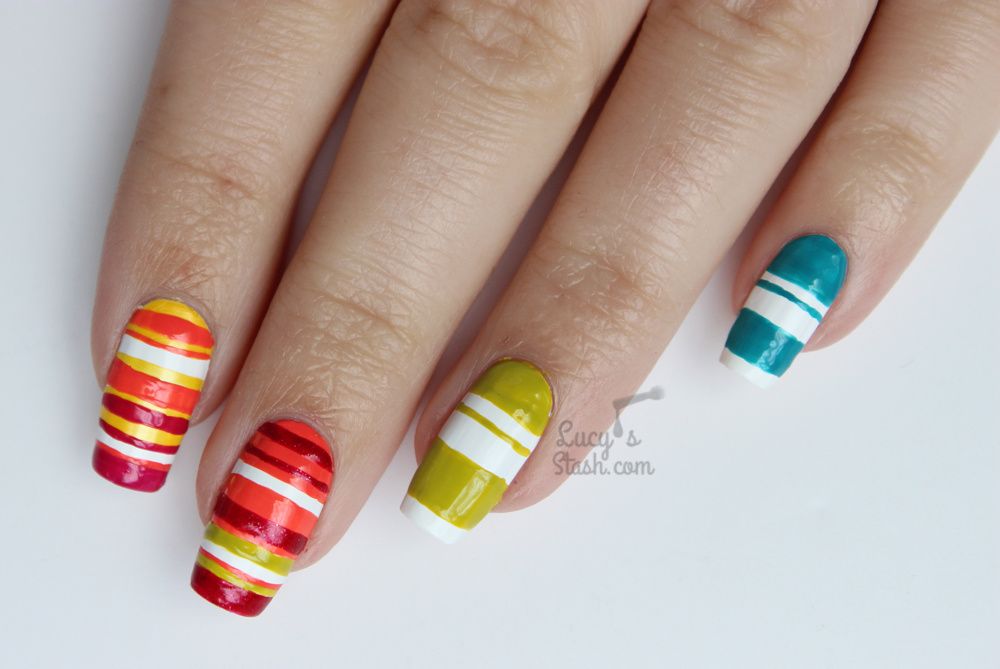
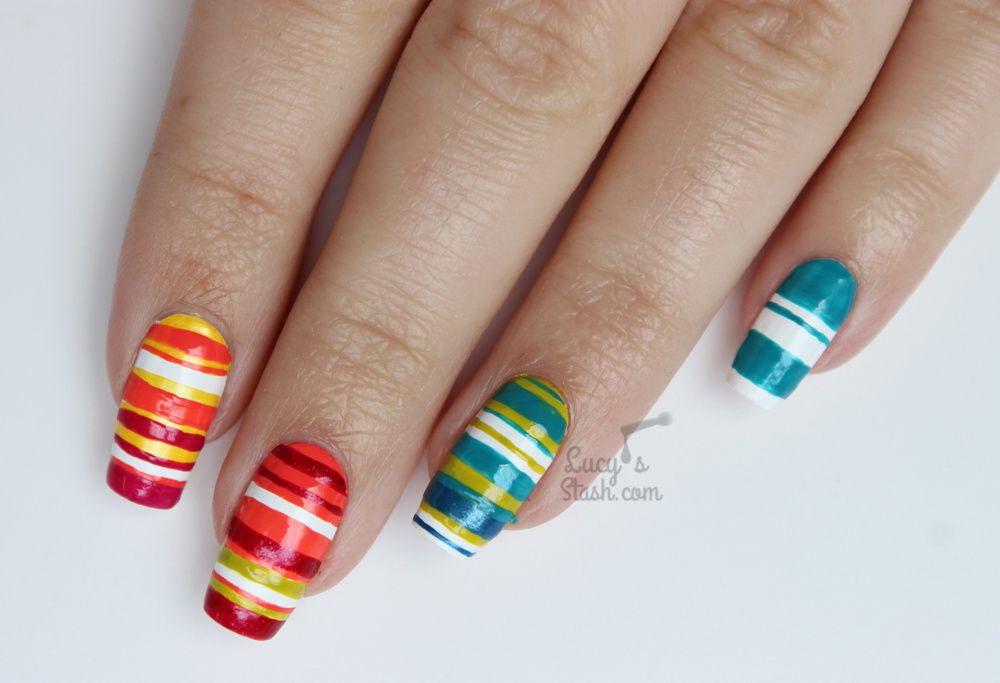
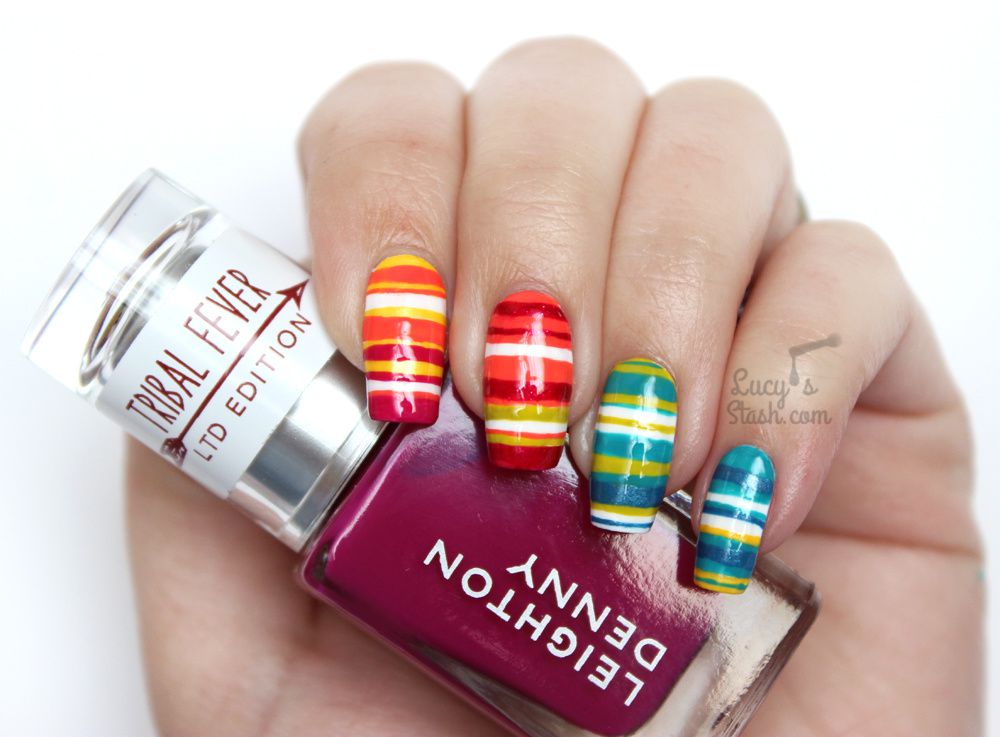
But back to nails - here's the finished look:

Dreamy Mandala Nails with TUTORIAL feat. Sally Hansen


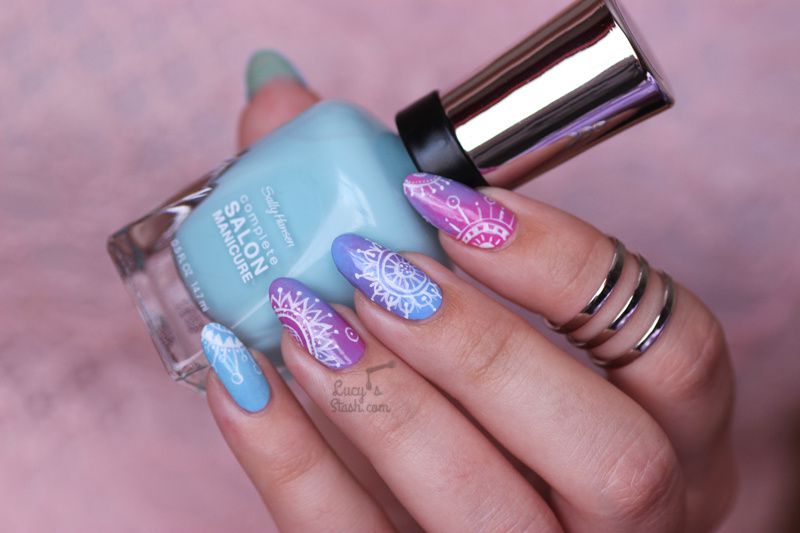
I've used the following products:


Sally Hansen Tulips are Talking*

Sally Hansen Grape Gatsby*

Sally Hansen Crush on Blue*

Sally Hansen Barracuda* - These Sally Hansen colours are Superdrug exclusives available now, RRP £6.99 - other colours available at uk.sallyhansen.com

Crystal Nails One Move white acrylic paint

Winstonia Berry Wine nail art brush

Bundle Monster Poli-Peel Latex Barrier

Make-up sponge

Revlon Gel Envy Diamond Top Coat*


Dreamy Mandala Nails with TUTORIAL feat. Sally Hansen


I instantly fell in love with these nails and wore them for 5 days. I don't know about you, but I could wear feminine and soft looks all the time. I do mix up the colours a lot but vampy colours or these soft looks are my favourites.


And here's the promised tutorial so you can recreate this look on yourself. The hand painted mandalas can be replaced by stamping, MoYou London has some pretty awesome mandala stamping plates.


I'm also wearing a Luna Pyxis 3 Lines adjustable midi ring I ordered a while ago :) It's a nice looking and fitting ring in silver colour and it costed $4.80


So what do you think? Will you try and do this design yourself? If so, I'd love to see it so tag me @lucysstash ♥


Have a lovely day and see you soon! Lucie x


*PR sample

Hello lovelies,


August has passed very fast for me and it's time for the monthly nail art challenge from Paint All The Nails. I completely forgot (thanks to my 2-week holiday) and I didn't have time to do any special colour block design. Luckily I've had an older manicure that I've done and that I can use. I still have my square shaped nails there but I'm sure you won't mind ;)


Today's manicure is very colourful and summery and I can show you a step by step tutorial of the design too! I've done it using Leighton Denny polishes and a Color Club French Tip white polish as a base. Yes guys, this is so far my favourite white nail polish. Here's the final look and list of all the polishes I've used:


Paint All The Nails Presents Colour Block Nail Art + TUTORIAL


These nails might look difficult to do but I've broken the design into small steps for you and in the end it's just painting lines. A great design to practice your line work ;)


How to:


Step 1 - Apply a base coat to clean and dry nails. Then paint them with one or two coats of white nail polish. I've used Colour Club French Tip which is very opaque so I got away with just one coat.

Paint All The Nails Presents Colour Block Nail Art + TUTORIAL


Step 2 - Paint the top of each nail with a different colour. I chose colours that will be somewhat dominant on the nail.

Paint All The Nails Presents Colour Block Nail Art + TUTORIAL


Step 3 - Add thin and thick stripes of the same colour to the nails

Paint All The Nails Presents Colour Block Nail Art + TUTORIAL


Step 4 - Start adding more stripes of different colours. Try to stick to similar colour families with the odd stripe in colour of the next nail to tie the nails visually together

Paint All The Nails Presents Colour Block Nail Art + TUTORIAL


Step 5 - Continue with adding more stripes and colours to the rest of the nails. Different widths of stripes make a really interesting effect

Paint All The Nails Presents Colour Block Nail Art + TUTORIAL


Step 6 - Finish up with a coat of Leighton Denny One For All (as a top coat) and admire your new beautiful nails ;)

Paint All The Nails Presents Colour Block Nail Art + TUTORIAL


My line work is far from perfect but all in all I quite liked this look. And practice makes perfect so imperfection isn't a fail at all, just another lesson on the path to perfection!


What do you think of this look? Would you wear it?


I'm so glad I was able to participate in this month's Paint All The Nails Challenge again and if you'd like to see what my fellow nail bloggers came up with, check out #paintallthenailscolorblock and the link up below!


Have a lovely day! Lucie x