/image%2F0703241%2F20140120%2Fob_b8b3b5_blog-header-new2.jpg "nail art - reviews - swatches - nail tutorials")
Hello lovelies,
The next letter in the ABC Challenge is K and since I didn't have a manicure ready that would be associated with something begining with K, I kind of butchered the word 'colour' and made it a 'kolour'! I hope you'll forgive me :D
In the previous post I showed you swatches of Sienna Byron Bay polishes in Grace and Blush and today I'll combine both into a simple and elegant nail art.
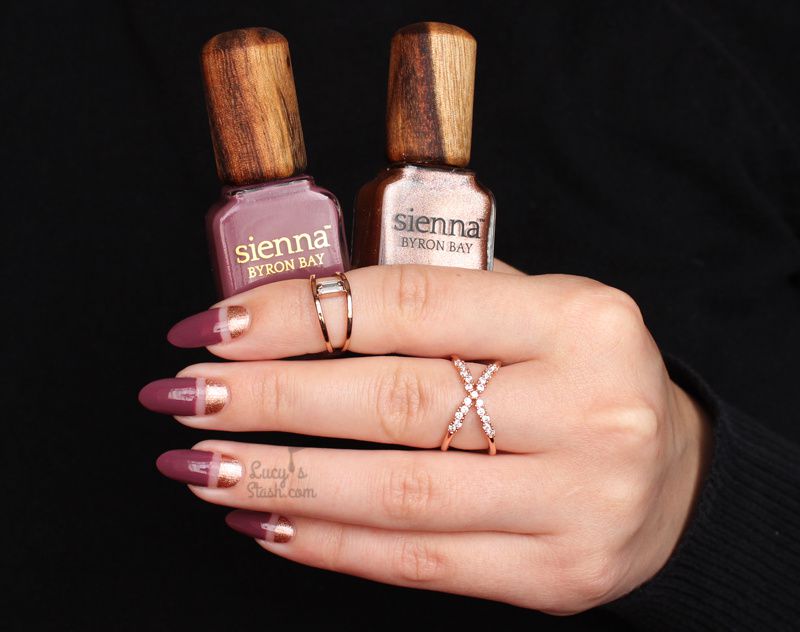
I chose these two colour deliberately because I thought they would look gorgeous together and I don't think I was wrong! I've created a very simple negative space design that is wearable for all ages. Let's check out the final look:


Here's how you can recreate this design:
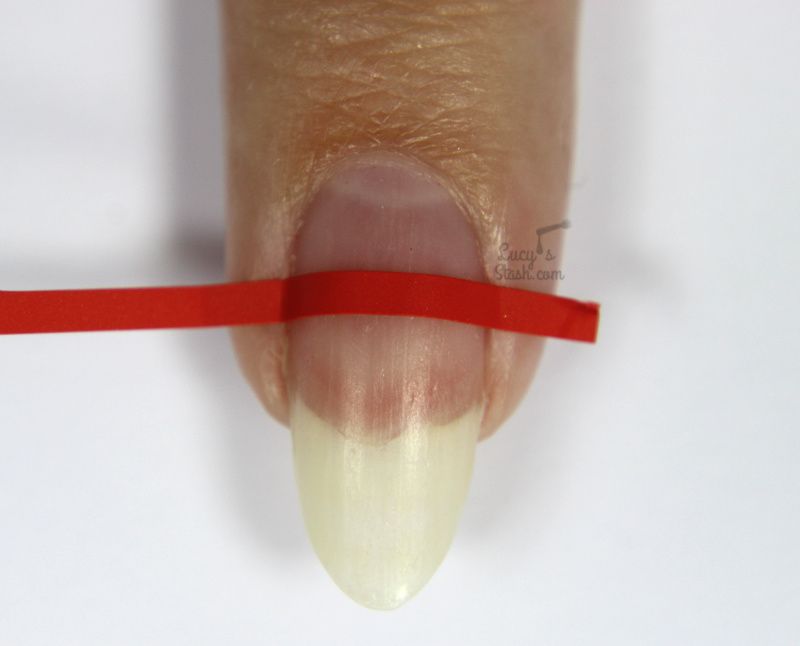
Step 1 - Start with clean and dry nails. You can leave out the base coat like I did and just apply a straight nail vinyl to where you'd like your negative space to be. I'm using nail vinyls from What's Up Nails.
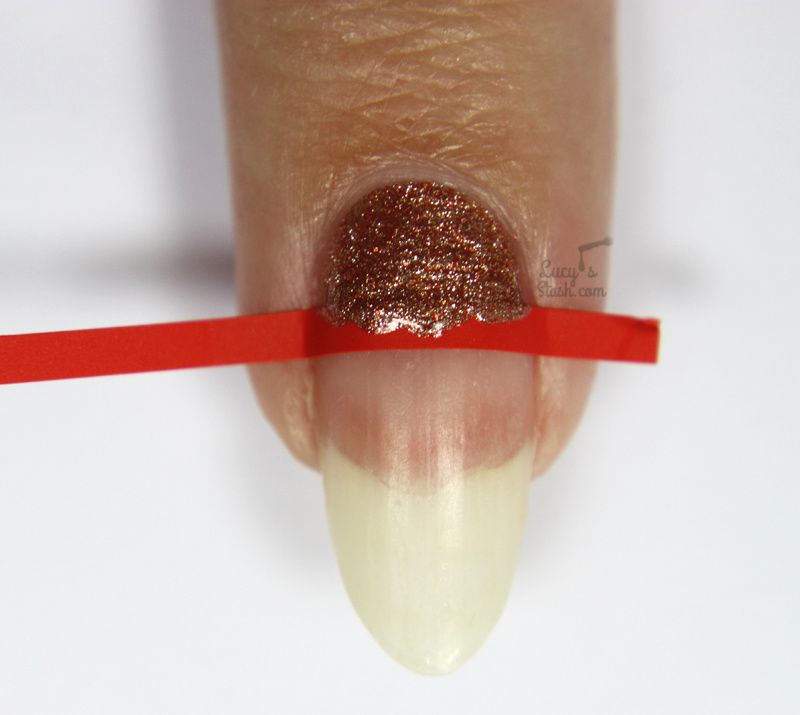
Step 2 - Paint the cuticle area of the nail with Sienna Byron Bay in Grace. leave the nail vinyl in place.
Step 3 - Paint the rest of the nail with


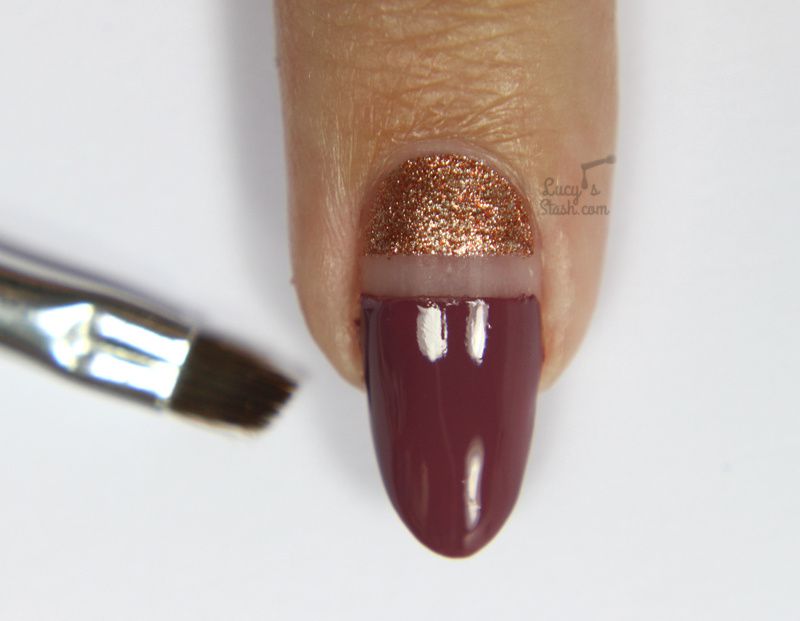
Step 5 - Apply a coat of Sienna Byron Bay Lightning Top Coat. If you don't want and uneven surface on the nail, firstly apply the topc coat only into the negative space to fill the void and let it dry. The apply top coat over the whole nail.


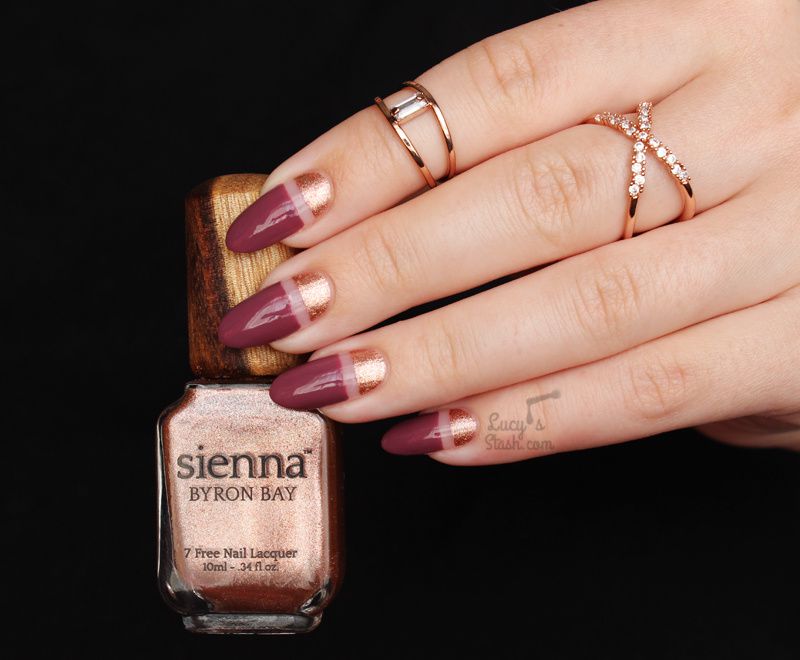

So those are my new nails - what do you think? I really enjoyed working with Sienna Byron Bay polishes, even the top coat is nice and you should definitely check this brand out. And the beautiful rings I'm wearing are from Luna Pyxis (just received my order of loads more!) - I'm wearing X Criss Cross Ring which is an adjustable ring with lots of crystals. The other one is Rectangle Cubic midi ring in rose gold colour and it features one big crystal.
Sienna Byron Bay nail polish range is 7 Free (No Formaldehyde, No Toluene, No DBP, No Synthetic Camphor, No Formaldehyde Resin, No Xylene and No Tosylamide), vegan and cruelty free - that's quite impressive. They can be purchased on their website and at international stocklists.
Have a lovely day! Lucie x
/image%2F0703241%2F20160710%2Fob_1adb10_sienna-byron-bay-polishes-4.jpg) Sienna Byron Bay Polishes & Top Coat - Review & Swatches
Sienna Byron Bay Polishes & Top Coat - Review & Swatches

/image%2F0703241%2F20201222%2Fob_7b3a98_semilac-my-love-gel-polish-nails-4.jpg) My Snowflake Nails for Christmas 2020 with Semilac...
My Snowflake Nails for Christmas 2020 with Semilac.../image%2F0703241%2F20200814%2Fob_22ce10_lart-supreme-kit-29-2.jpg) REVIEW: LART Supreme Mineral Powder Dipping System...
REVIEW: LART Supreme Mineral Powder Dipping System.../image%2F0703241%2F20170429%2Fob_799087_gilded-marbled-amethyst-nails-6.jpg) Dress your nails to impress with this marbled amethyst...
Dress your nails to impress with this marbled amethyst.../image%2F0703241%2F20170727%2Fob_3240b9_pink-gold-dry-brush-nail-art-4.jpg) The Manicure That (I) Rocked The Scratch Stars Awards...
The Manicure That (I) Rocked The Scratch Stars Awards...