/image%2F0703241%2F20140120%2Fob_b8b3b5_blog-header-new2.jpg "nail art - reviews - swatches - nail tutorials")
*PR samples
Hello lovelies,
So just to update you a bit - I'm feeling better than last week but I'm still a bit ill and very tired all the time. But on the plus side I got my wedding dress! I'm so happy I got one, it's a lot of stress off my shoulders. Obviously I can't show you until the wedding but it's very pretty ;) Now let's do some nails...
It's not too late for snowflake nails, is it? ;)
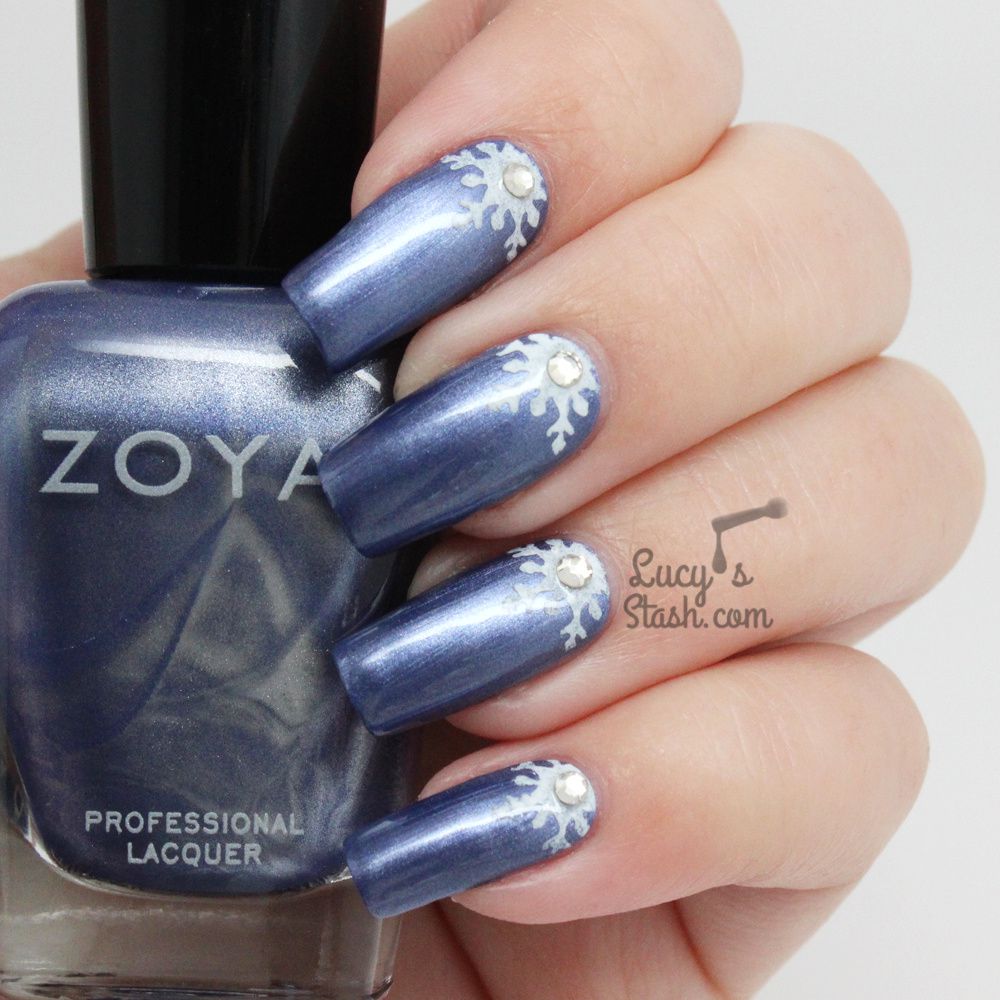

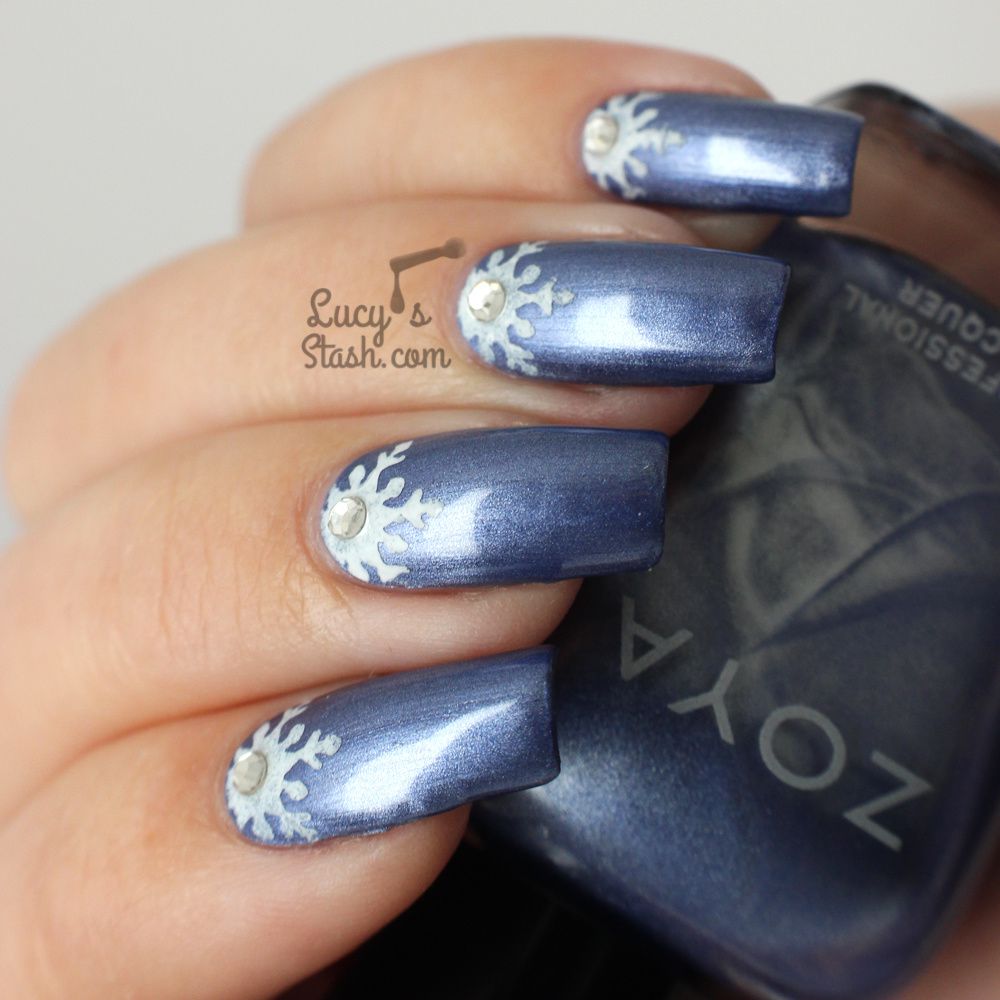
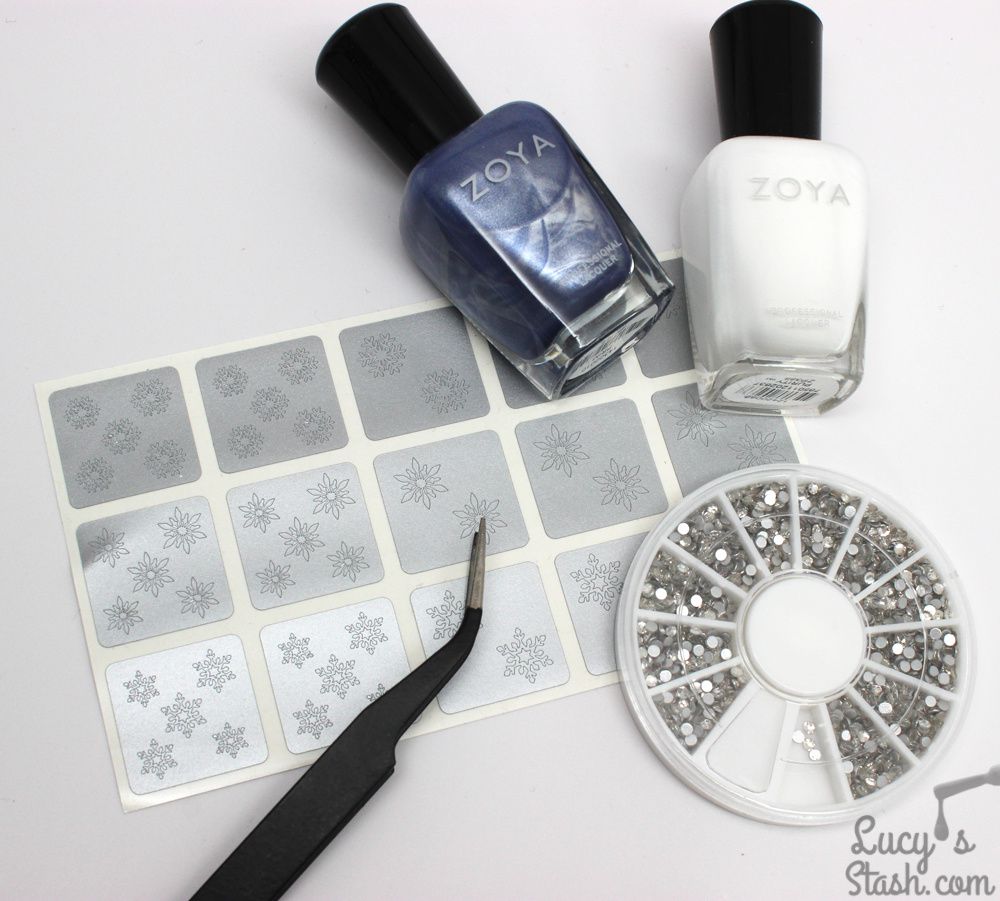
I've got sent Snowflake stencils from Whats Up Nails* and I've decided to try and do Snowflake Half Moon design. It was super easy with them an I've used half of one stencil for all 5 nails so you can do with just one snowflake stencil cut in half for both hands.
I've used two coats of Zoya Prim and topcoated them. Then I've applied half of the snowflake sticker to the nail and sponged on white Zoya Purity with make up sponge. That creates that softer snowy look. I removed the sticker immediately to get crisp edges. Once the white polish dried a bit I applied topcoat and added a silver crystal rhinestone*. I got these particular ones from Light The Box shop (they come in a pouch so I put them in the rhinestone wheel). Oh and the tweezers are from the same shop as well (available here).
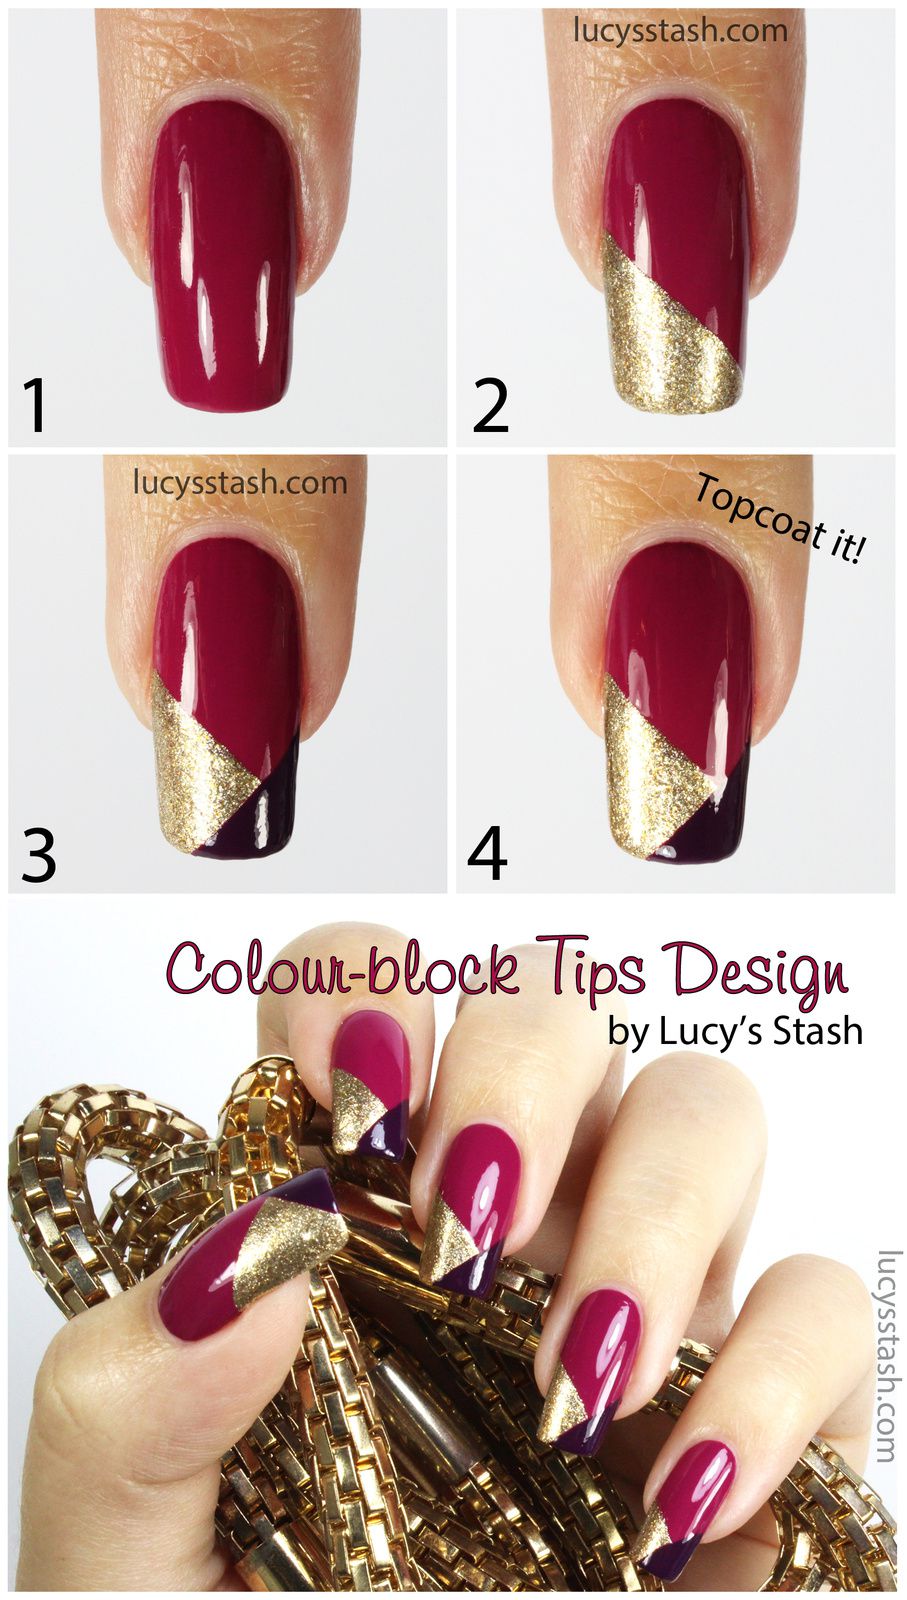
Here's a picture tutorial to show how I've done this design:

This design is so simple to do with the Snowflake stencils and I'll probably use them again before Christmas. If you're not very skilled in intricate nail art then stencils are great tool. have many different types from the regular chevron and stripe stickers to holiday and Valentine's Day themed stencils.
TIP: They also carry THOSE awesome nail art brushes that so many nail artists including me use - Pure Color! I will show them to you again in some future post.
Have a good start of the week! Lucie x
/image%2F0703241%2F20201222%2Fob_7b3a98_semilac-my-love-gel-polish-nails-4.jpg) My Snowflake Nails for Christmas 2020 with Semilac...
My Snowflake Nails for Christmas 2020 with Semilac.../image%2F0703241%2F20200814%2Fob_22ce10_lart-supreme-kit-29-2.jpg) REVIEW: LART Supreme Mineral Powder Dipping System...
REVIEW: LART Supreme Mineral Powder Dipping System.../image%2F0703241%2F20170429%2Fob_799087_gilded-marbled-amethyst-nails-6.jpg) Dress your nails to impress with this marbled amethyst...
Dress your nails to impress with this marbled amethyst.../image%2F0703241%2F20170727%2Fob_3240b9_pink-gold-dry-brush-nail-art-4.jpg) The Manicure That (I) Rocked The Scratch Stars Awards...
The Manicure That (I) Rocked The Scratch Stars Awards...


/image%2F0703241%2F20170413%2Fob_a5aa85_current-products-i-use-13-04-17-1.jpg) From Lucy's Stash: Nail & Hand Care Products I Currently...
From Lucy's Stash: Nail & Hand Care Products I Currently.../image%2F0703241%2F20160416%2Fob_99f9dd_nafw2016-maria-cornejo-inspired-nail-a.jpg) NAFW 2016 Day 7 - Inspired by Fall 2016 Runway Nail...
NAFW 2016 Day 7 - Inspired by Fall 2016 Runway Nail.../image%2F0703241%2F20160407%2Fob_600118_all-that-jazz-rose-bud-stickers-barfl.jpg) What I wore to PRO Beauty Exhibition | Nail Art feat....
What I wore to PRO Beauty Exhibition | Nail Art feat..../image%2F0703241%2F20160310%2Fob_7447c9_professional-beauty-london-2016-12.jpg) Report: My visit to Professional Beauty Exhibition...
Report: My visit to Professional Beauty Exhibition...