/image%2F0703241%2F20140120%2Fob_b8b3b5_blog-header-new2.jpg "nail art - reviews - swatches - nail tutorials")
Hello lovelies,
I think it's about time I've done a review of a gel polish kit. I've decided to pause any work on Lucy's Stash PRO and focus on this blog because it turned out that I just don't have time for both. So you will see occasional gel polish reviews and nail art here. You don't mind, right? ;)
Well, today I'd like to talk about a new gel polish brand to me - Evixi Gel. Evixi Gel currently comes in 40 shades priced at £9.99 each. There is also a top coat, base coat, cleanser, remover and 2 types of gel curing lamps available. I got Evixi Gel Full Starter Kit and 4 additional colours (so 5 colours in total). Here's how the Full Starter Kit looks and what it contains:


Everything came in a sturdy black box with Evixi Gel logo on it and nicely wrapped in a hot pink tissue paper. The Starter Kit contains full-sized products: LED lamp, Cleanser, Remover, Top coat, Base coat and 1 colour of your choice. Right now, the kit is on offer for £49.99 (down from £85.94). This is an amazing value for full kit considering that just the lamp is £39.99 and also looking at other kits out there! This is basically all you need to do your own gel polish manicure.
I've prepared a list of steps for you which might help you to get a good, long-lasting gel polish manicure. Some of you might know that I've got several qualifications in gel polish, manicure and nail technology so I'll try and add some extra information to help you get the best results!
- Make sure your hands are clean so wash them with soap and/or use hand sanitizer. This is especially important if you're doing nails on somebody else
- File and shape the nails with nail file if needed
- Remove the cuticles from the nail plate (I gently use metal tool to scrape the cuticles off)
- Wipe the nails with Evixi Cleanser. This will remove oils and water from the nails
- Apply a thin coat of Evixi Base Coat on the nails and cure for 30 seconds
- Apply first coat of coloured gel polish and cure for 30 seconds. Always apply thin coats because thick coats might not cure properly and they can wrinkle
- Apply second thin coat of gel polish and cure for 30 seconds. If the colour is not opaque enough, apply third coat. Otherwise continue to step 8
- Apply a coat of Evixi Top Coat and cure for 30 seconds
- Wipe off the inhibition (sticky) layer with Evixi Cleanser. Always put the wipe with cleanser on the nail and wipe off, don't wipe up and down because you don't want to get the sticky residue on your skin. It is best to use a new wipe on each nail or at least fold the wipe over before using on the next nail. This is to avoid allergies that could develop over time
I hope this will help you and if you have any questions, feel free to ask. I've made a video tutorial for a Gelish gel polish application but same principles apply here so CLICK HERE FOR VIDEO TUTORIAL if you'd like to see it.
Next up I want to show you the colours I got. They are (L-R) Licorice (black creme), Garnet (deep burgundy creme), Amazing Amethyst (Lavender creme), Lapis Lazuli (medium blue creme) and Pacific Green (mint green creme). Each colour comes in a white opaque bottle with just a little triangle window to show the shade inside. I've swatched them here and I've used 2 coats of each shade and topcoat.


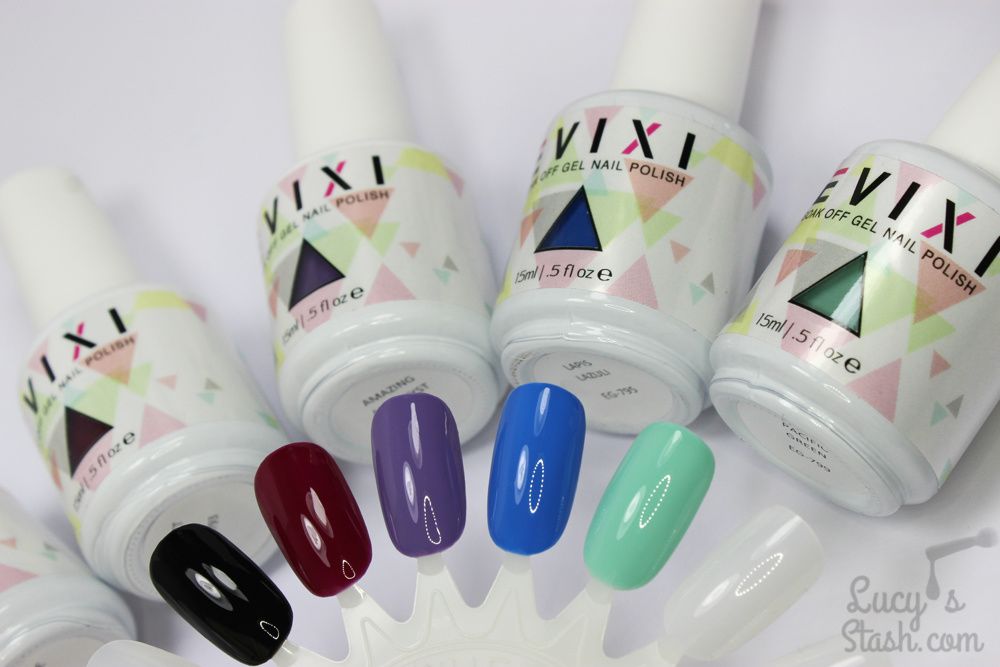
The formula was good and I didn't experience major problems applying it. It is thicker (like gel polishes can be) which on one side is good that the gel polish doesn't run but on the other side in needs to be properly worked it and applied to avoid any bald patches. I actually really like the thicker formula because it makes it ideal for nail art as well as one-colour application. All colours except Garnet had this nice thicker consistency and great pigmentation. Garnet was slightly on the thinner side and also a bit less pigmented so three thin coats might be required for this one. Base and top coat are both thinner than the gel polishes so they apply very easily but always use a thin coat. The removal was easy as well, just like any regular gel polish. I've used the foil soak off method, but more about it in the next post.
The Evixi Gel LED lamp is quite compact yet you can still fit whole hand in it. It comes in a white colour and four time settings - 30s, 60s, 90s and 120s. It worked well and cured the gel polish without any obvious issues.
All in all, my experience with Evixi products was very positive and without issues. The
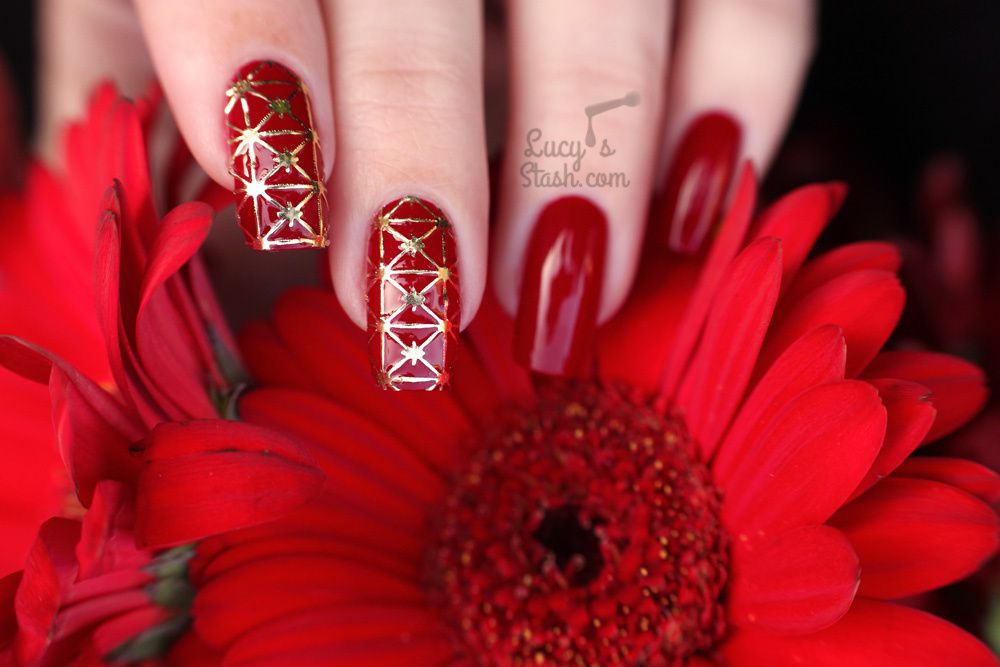
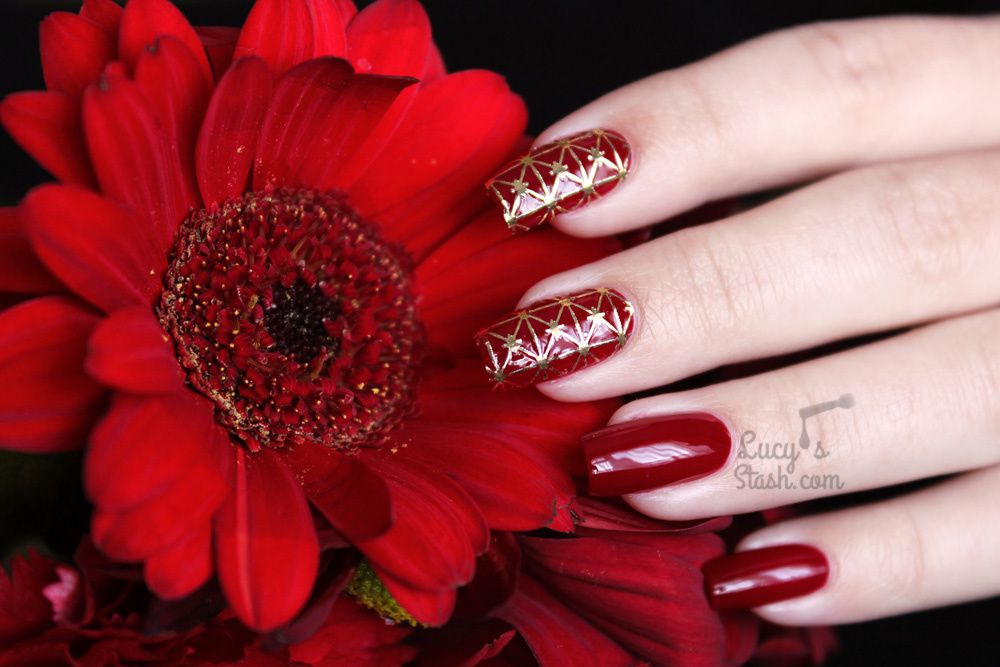
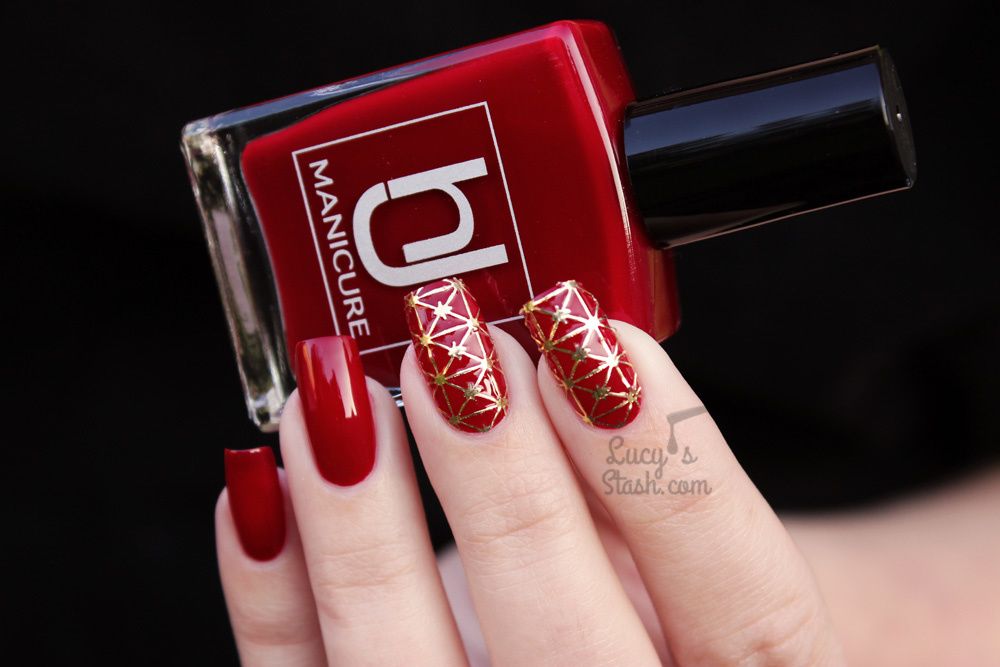
So this was part 1 of my Evixi review. And what's in the part 2? Well, I have tested an Evixi gel polish nail art manicure while I was on holiday so the next post will be all about it. Stay tuned and have a lovely day! Lucie x
*Products in this post were PR samples
/image%2F0703241%2F201307%2Fob_5db28a_capture-d-e-cran-2013-07-24-a-09-46-53.png) What's new in 'Lucy's Stash'? Product haul from October
What's new in 'Lucy's Stash'? Product haul from October


/image%2F0703241%2F20201222%2Fob_7b3a98_semilac-my-love-gel-polish-nails-4.jpg) My Snowflake Nails for Christmas 2020 with Semilac...
My Snowflake Nails for Christmas 2020 with Semilac.../image%2F0703241%2F20200814%2Fob_22ce10_lart-supreme-kit-29-2.jpg) REVIEW: LART Supreme Mineral Powder Dipping System...
REVIEW: LART Supreme Mineral Powder Dipping System.../image%2F0703241%2F20170429%2Fob_799087_gilded-marbled-amethyst-nails-6.jpg) Dress your nails to impress with this marbled amethyst...
Dress your nails to impress with this marbled amethyst.../image%2F0703241%2F20170727%2Fob_3240b9_pink-gold-dry-brush-nail-art-4.jpg) The Manicure That (I) Rocked The Scratch Stars Awards...
The Manicure That (I) Rocked The Scratch Stars Awards...