/image%2F0703241%2F20140120%2Fob_b8b3b5_blog-header-new2.jpg "nail art - reviews - swatches - nail tutorials")
Hello lovelies,
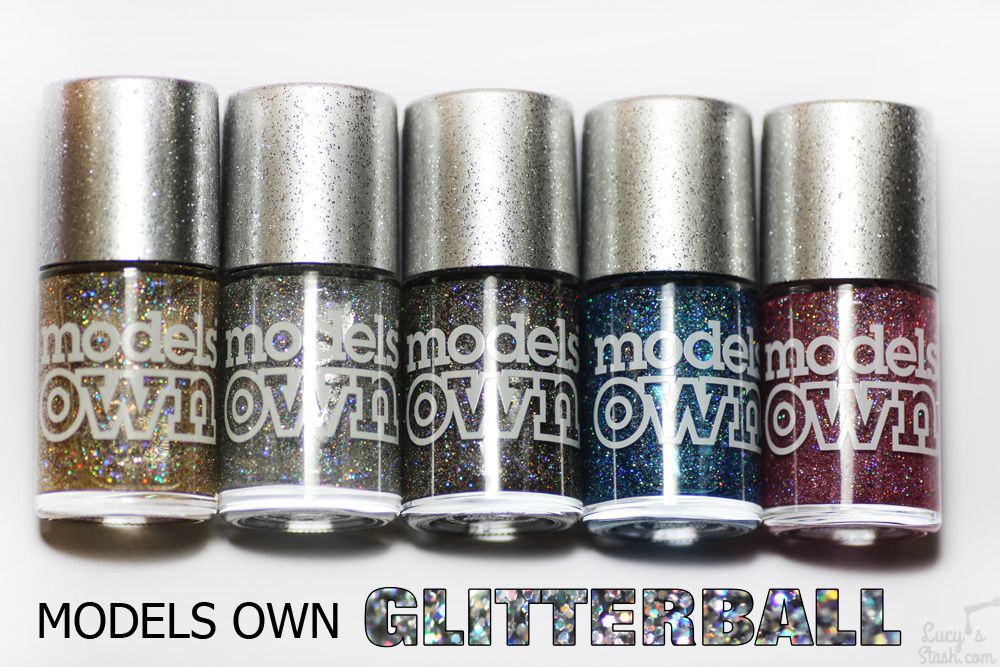
I'm so excited to be the first to show you the latest Models Own collection - Glitterball! Models Own introduces new collections regularly and it's about time we've had some new glitters for the holiday season! The glitterball collection is being released this Thursday, 17 November 2016.
The Glitterball collection consists of five holographic glitter shades in coloured jelly base. They can applied by themselves or layered over other nail polish or they can also be transformed into textured glitters similar to Zoya Magical Pixie or OPI Liquid Sands. So this collection is pretty versatile.
Let's have a look at the collection:


FORMULA
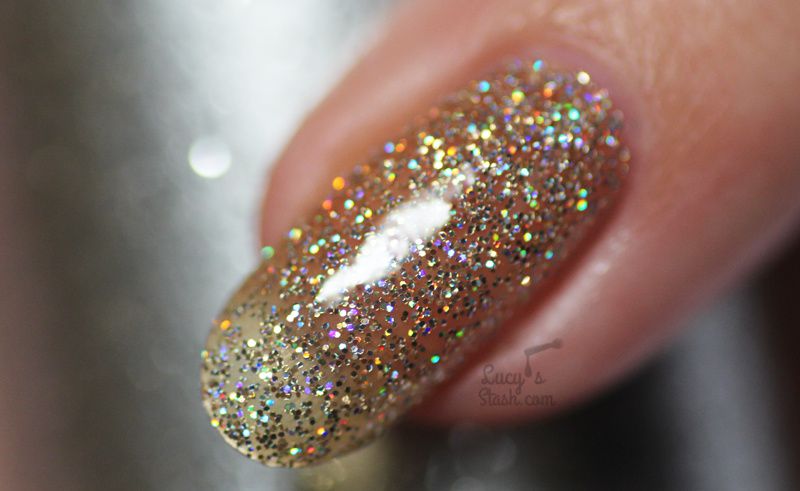
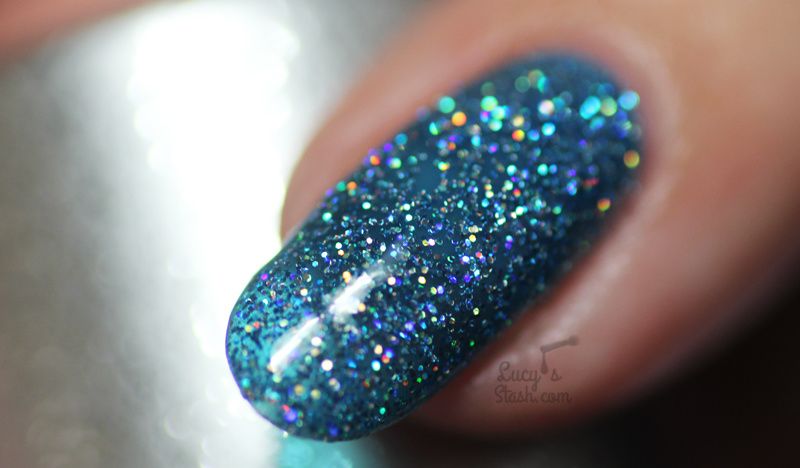
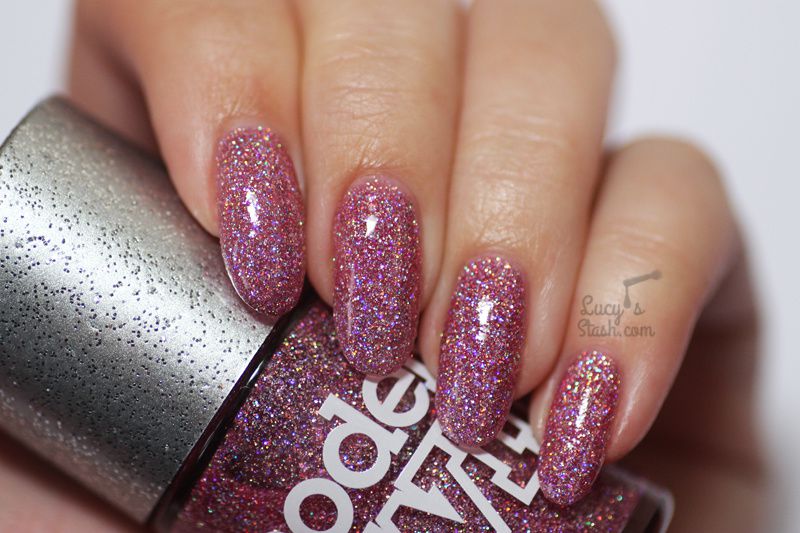
Formula was the same for the whole collection - it applied well and the glitter is medium to densely packed. You can get a nice coverage in the first coat but the colour (or nail) will be visible through (you can see one coat over different colours at the end).
The glitter is suspended in a clear or coloured base which affects it's opacity. The darker colours are almost opaque in two coats, the lighter shades like Fine Flicker and The Precious would need three coats for full opacity. They dry fast and textured/rough due to glitter so I would recommend 1-2 coats of thicker top coat for smooth and glossy finish.
BOTTLE & BRUSH
Each of the bottles has a limited edition silver cap with embeded silver glitter so the caps themselves feel textured. This colection has the popular flat tapered brush with rounded off bristles. I love this brush because it allowed me for more precise application and I didn't have to do ANY clean up on these swatches. I wish this brush was in all their polishes!
AVAILABILITY & PRICE
The Glitterball collection will be available at modelsownit.com and in their Bottle Shops from 17 November 2016 for £4.99 per bottle.
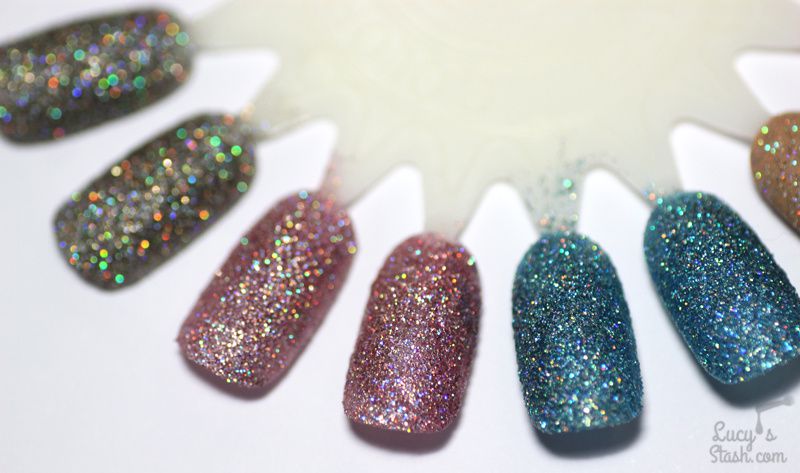
Fine Flicker - holographic glitter in a golden yellow jelly base. 2 coats and a thick layer of top coat.


Glitz n Glam - holographic glitter in dark turquoise blue jelly base. 2 coats and a thick layer of top coat.


Showbiz - holographic glitter in dark grey jelly base. 2 coats and a thick layer of top coat.


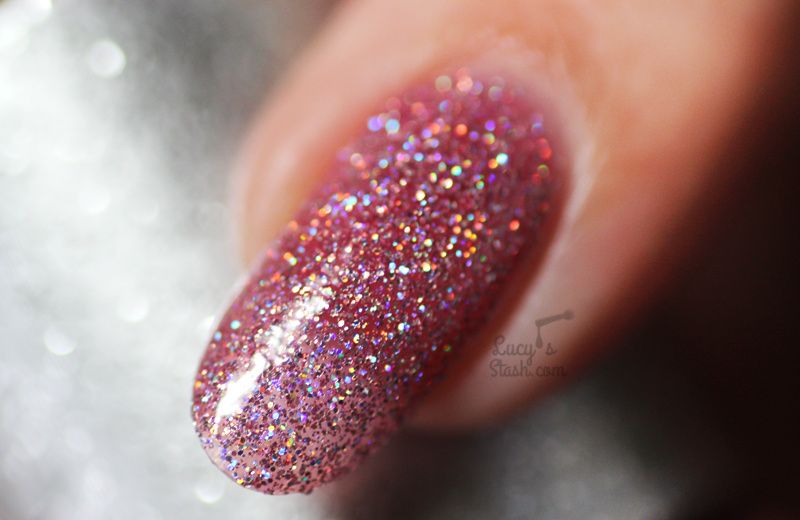
Tinsel Town - holographic glitter in rose pink jelly. 2 coats and a thick layer of top coat.

The Precious - silver holographic glitter in clear base. 2 coats and a thick layer of top coat.


How to transform Model Own Glitterball polishes into textured finish:
Step 1 - Paint your nails with base coat and one coat of the Glitterball polish
Step 2 - Apply a skin protector around nails (e.g. liquid latex)
Step 3 - Paint the glitterball polish on a makeup sponge and sponge it on the nail. Repeat until the nail is covered in glitter
You can leave it like this and have a textured finish which feels like a sand or you can apply two coats of topcoat to get a full coverage glitter with glossy finish. The glitter comes alive with topcoat and the sparkle is amazing!


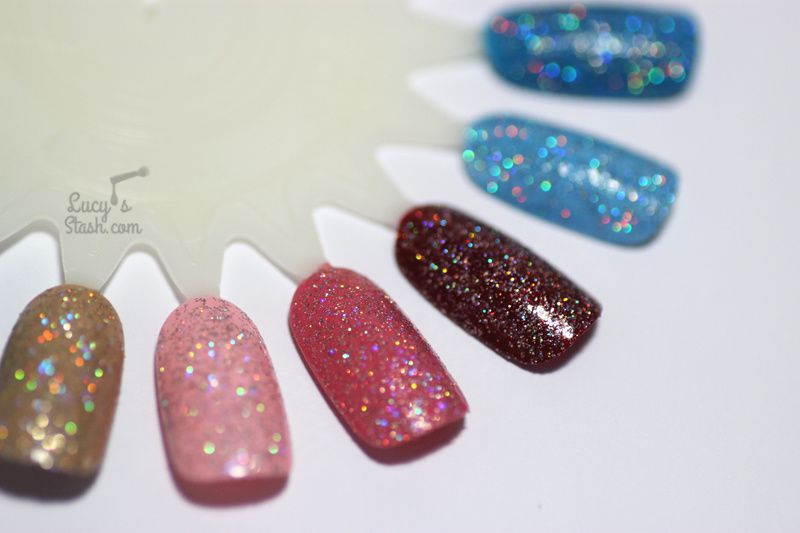

Here's the list of colours I've used for the above layered looks (all polishes used were Models Own):
- Fine Flicker over Dare to Bare
- The Precious over Pink Icing
- Tinsel Town over Cashmere Rose
- Tinsel Town over Marquise Maroon
- Glitz n Glam over Powder Blue
- Glitz n Glam over Blue Glint
- Showbiz over Everyday grey
- The Precious over Emerald Black
THE COMPETITION
You can with one of 3 sets of the Glitterball collection right now on my Instagram thanks to Models Own who are donating the prize. Open to UK residents.
To enter: Head over to my Instagram page, follow @lucysstash & @modelsownofficial, repost the competition image and tag @modelsownofficial along with #GlitterballNails and that’s it! Good Luck!
Have a lovely day! Lucie x
*Polishes sent for review, no sponsored content
/image%2F0703241%2F20160828%2Fob_2a36ab_pink-and-bare-minimalist-nail-art-4.jpg) Abstract Nail Art with Models Own Dare to Bare Collection
Abstract Nail Art with Models Own Dare to Bare Collection/image%2F0703241%2F20160726%2Fob_bb99fb_pastel-neon-watermarble-with-mo-soft-p.jpg) ABC Challenge: M is for Marbled Nail Art | Nail Art...
ABC Challenge: M is for Marbled Nail Art | Nail Art.../image%2F0703241%2F20160726%2Fob_5f7bea_neon-yolo-gradient-and-stamping-2.jpg) Paint All The Nails Presents Neon Nail Art
Paint All The Nails Presents Neon Nail Art/image%2F0703241%2F20160625%2Fob_9130ac_models-own-soft-pop-collection3.jpg) Models Own Soft Pop HyperGel Collection - Review &...
Models Own Soft Pop HyperGel Collection - Review &...


/image%2F0703241%2F20201222%2Fob_7b3a98_semilac-my-love-gel-polish-nails-4.jpg) My Snowflake Nails for Christmas 2020 with Semilac...
My Snowflake Nails for Christmas 2020 with Semilac.../image%2F0703241%2F20200814%2Fob_22ce10_lart-supreme-kit-29-2.jpg) REVIEW: LART Supreme Mineral Powder Dipping System...
REVIEW: LART Supreme Mineral Powder Dipping System.../image%2F0703241%2F20170429%2Fob_799087_gilded-marbled-amethyst-nails-6.jpg) Dress your nails to impress with this marbled amethyst...
Dress your nails to impress with this marbled amethyst.../image%2F0703241%2F20170727%2Fob_3240b9_pink-gold-dry-brush-nail-art-4.jpg) The Manicure That (I) Rocked The Scratch Stars Awards...
The Manicure That (I) Rocked The Scratch Stars Awards...